Raising Cane’s Style Chicken Fingers (Crispy, Juicy, and Seriously Addictive)
Introduction
When I make these Raising Cane’s–style chicken fingers at home, I’m always a little surprised at how close they come to the real thing. Crispy on the outside, super juicy on the inside, and that sauce… honestly, I could dip just about anything in it.
I’ve tried this a few different ways over time, and what finally worked was focusing on the marinade and getting that coating just right. It’s not a complicated recipe, but there are a couple of steps that really make a difference.
What I love most is that you don’t need anything fancy—just a bit of patience and a good fry. And yes, it’s not the quickest recipe, but it’s absolutely worth it once you take that first bite.
Why This Recipe Works
The buttermilk marinade keeps the chicken tender and flavorful all the way through.
The flour and cornstarch combo gives that craggy, crunchy coating I was chasing.
And the sauce ties everything together—it’s creamy, tangy, and just a little smoky.
Raising Cane’s Style Chicken Fingers
Cooking Advice
When I make this, I don’t rush the marinating step—that’s where most of the flavor builds. I’ve also learned to press the coating onto the chicken instead of just lightly dredging it.
One mistake I made early on was frying at the wrong temperature. Too low, and the coating gets soggy. Too hot, and the outside browns before the inside cooks. Keeping the oil steady makes a huge difference.
You can tweak the spices a bit, but I still prefer keeping it simple—it’s closer to the original that way.
Ingredients Needed
For the Chicken
- 2 lbs chicken breast, cut into strips
- Oil for frying (vegetable or canola works well)
For the Wet Batter (Marinade)
- 2 cups buttermilk
- 2 tbsp garlic powder
- 1 tbsp smoked paprika
- 1 tbsp black pepper
- Salt to taste
For the Dry Coating
- 2 cups all-purpose flour
- 3 tbsp cornstarch (this helps with crispiness)
- 1 tbsp garlic powder
- 1 tsp smoked paprika
- 1 tsp black pepper
- Salt to taste
For the Cane’s Sauce
- 1 cup mayonnaise
- 4 tbsp ketchup
- 2 tbsp Worcestershire sauce
- 1 tbsp garlic powder
- 1 tsp smoked paprika
- 1 tsp black pepper
- Salt to taste
Step-by-Step Instructions
Step 1: Marinate the Chicken
Add the chicken strips into the buttermilk mixture. Make sure everything is fully coated.
Cover and let it sit for at least 2 hours, but overnight is even better. The chicken should look slightly thicker and well-soaked.
Step 2: Prepare the Coating
In a separate bowl, mix together the flour, cornstarch, and spices.
The mixture should feel light and slightly textured—this is what gives that crispy finish.
Step 3: Coat the Chicken
Take each strip out of the marinade, letting the excess drip off.
Press it into the dry mixture, really packing the coating onto the surface. I’ve rushed this before, and it makes a difference—you want those little craggy bits.
Step 4: Heat the Oil
Heat your oil to about 350°F (175°C).
If you drop a small bit of batter in and it sizzles immediately, you’re good to go.
Step 5: Fry Until Golden
Carefully add the coated chicken into the oil. Don’t overcrowd the pan.
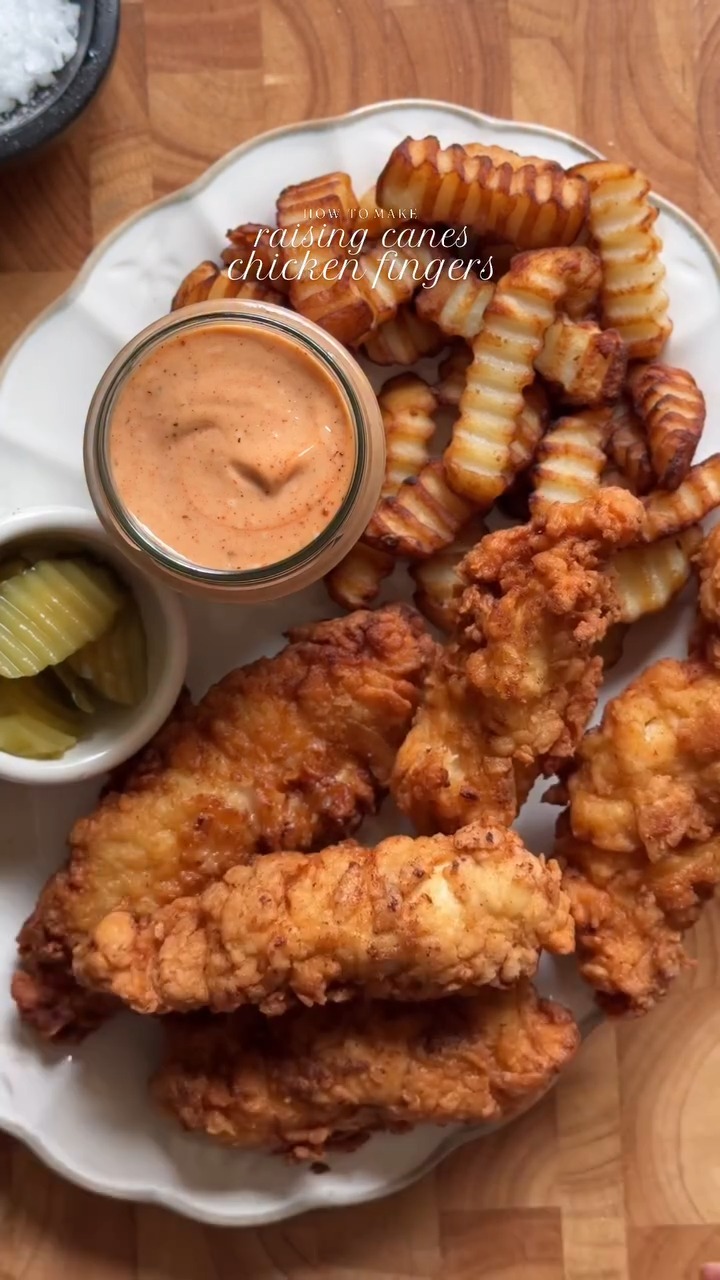
Fry for about 8–10 minutes, flipping halfway through. The outside should turn a deep golden brown with a crisp, textured crust.
Step 6: Drain and Rest
Remove the chicken and place it on a wire rack or paper towels.
It should feel crisp right away, and you’ll hear that slight crunch when you tap it.
Step 7: Make the Sauce
Whisk together mayonnaise, ketchup, Worcestershire sauce, and spices until smooth.
The color should be a light orange with specks of seasoning. I usually let it sit for 15–20 minutes—it somehow tastes better after resting.
Final Dish Presentation
Serve the chicken fingers hot on a plate with crinkle-cut fries, a small bowl of sauce, and a side of pickles if you like that classic combo. I like stacking the chicken slightly—it just looks more inviting that way.
Occasions to Serve
This is perfect for a casual weekend meal, game nights, or when you’re just craving something crispy and satisfying. It’s also a hit with friends—there are never leftovers when I make it for a group.
Cooking Tips
- Keep your oil temperature steady for even frying
- Don’t skip the cornstarch—it really helps with crunch
- Let the coated chicken sit for a few minutes before frying for better adhesion
Variations
- Add a pinch of cayenne if you want a little heat
- Use chicken tenders instead of breast for a softer texture
- Air fry instead of deep fry (though I still prefer frying for that classic crunch)
Serving Suggestions
Pair it with crinkle fries, toast, or even a simple coleslaw.
Could be just me, but I also love dipping fries directly into the sauce—it’s just as good.
Storage Tips
Store leftovers in an airtight container in the fridge for up to 3 days.
Reheat in the oven or air fryer to bring back the crispiness—microwaving works, but you’ll lose that crunch.
Closing Note
I keep coming back to this recipe because it actually delivers on that crispy, juicy combo every time.
Once you get the hang of the coating and frying, it’s one of those recipes that just clicks.