14+ Make-Ahead Lunch Ideas for Work That Actually Taste Amazing
I’ll be honest — I spent way too long eating sad desk lunches. You know the ones. A limp sandwich thrown together at 7am, or worse, whatever the vending machine had left by noon. It wasn’t until I started seriously meal-prepping on Sundays that my whole week changed. These aren’t just “functional” lunches — they’re meals I genuinely look forward to opening up at 12:30pm.
What I love about this collection is how varied it is. Some are warm and hearty, some are light and fresh, and a few are just downright fun to make. Whether you’ve got 10 minutes on a Sunday or a full afternoon to prep, there’s something here for every kind of schedule. I’ve included wraps, bowls, pasta salads, rice balls, and even a poke bowl — because why should lunch be boring? Let’s get into it.
1. Creamy Rotisserie Chicken & Herb Wrap
Description
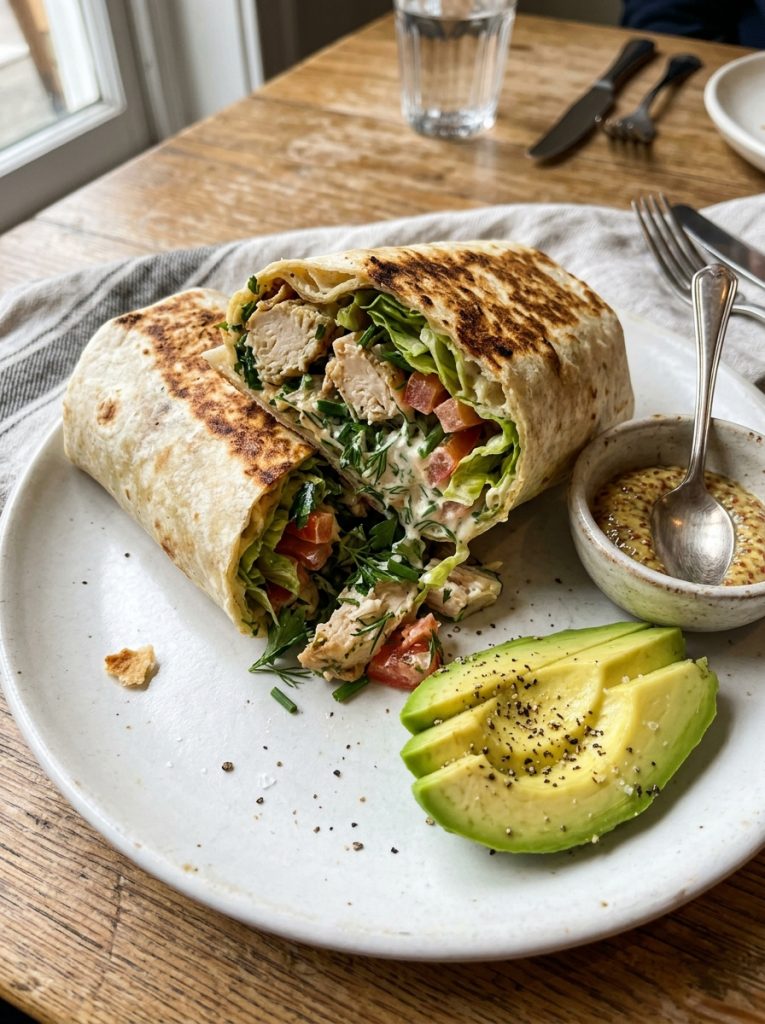
This wrap is one of those recipes I end up making every other week without even planning it. It comes together in almost no time at all, and the result is something that genuinely feels put-together — not like a sad desk lunch at all. The creaminess from Greek yogurt, the little crunch of celery, the brightness from a touch of mustard — it just works.
The texture is soft and creamy with little pockets of crunch, and the flavor is savory with a mild tang. It’s the kind of wrap that doesn’t need anything fancy to taste really good. I love making a big batch of the chicken mix on Sunday and just grabbing tortillas throughout the week.
Ingredients
- 2 cups rotisserie chicken, shredded (roughly half a store-bought chicken)
- 3 tablespoons Greek yogurt (or mayo — I use a mix of both)
- 1 teaspoon Dijon mustard
- 2 stalks celery, finely chopped
- 2 green onions, sliced thin
- Salt and pepper to taste
- 4 large flour tortillas
- Handful of romaine lettuce or butter lettuce leaves
- Optional: ½ avocado, sliced; a drizzle of hot sauce
Process
- Step 1 — Shred the chicken: Pull the rotisserie chicken apart by hand or use two forks. You want shreds, not chunks — they hold better in the wrap.
- Step 2 — Make the filling: In a bowl, combine the shredded chicken with Greek yogurt, Dijon mustard, celery, and green onions. Season with salt and pepper. Stir well until everything’s evenly coated. Taste and adjust — add more mustard if you want a bit more kick, or more yogurt for extra creaminess.
- Step 3 — Warm your tortilla: Lay a tortilla flat and warm it briefly in a dry pan or in the microwave for 15 seconds. This makes it more pliable and way easier to roll.
- Step 4 — Assemble: Add a layer of lettuce down the center. Spoon a generous portion of the chicken mix on top. Add avocado slices if using.
- Step 5 — Wrap it up: Fold in the sides, then roll tightly from the bottom. Wrap in foil to keep it compact and fresh for transport.
- Step 6 — Pack and go: Keep the wrapped tortilla in the fridge overnight. It holds up beautifully until lunchtime.
Occasions
- Busy weekday work lunches
- School lunchboxes for older kids
- Quick weekend meal prep
- Picnic or outdoor gatherings
Quick Tips
- Don’t oversaturate the filling. Too much yogurt makes the tortilla soggy by lunchtime — keep it just creamy enough to hold together.
- Wrap in foil, not plastic. Foil holds the shape better and keeps it from unraveling in your bag.
- The filling keeps for up to 3 days in the fridge, so you can prep a week’s worth all at once.
2. Sun-Dried Tomato Pesto Pasta Salad
Description
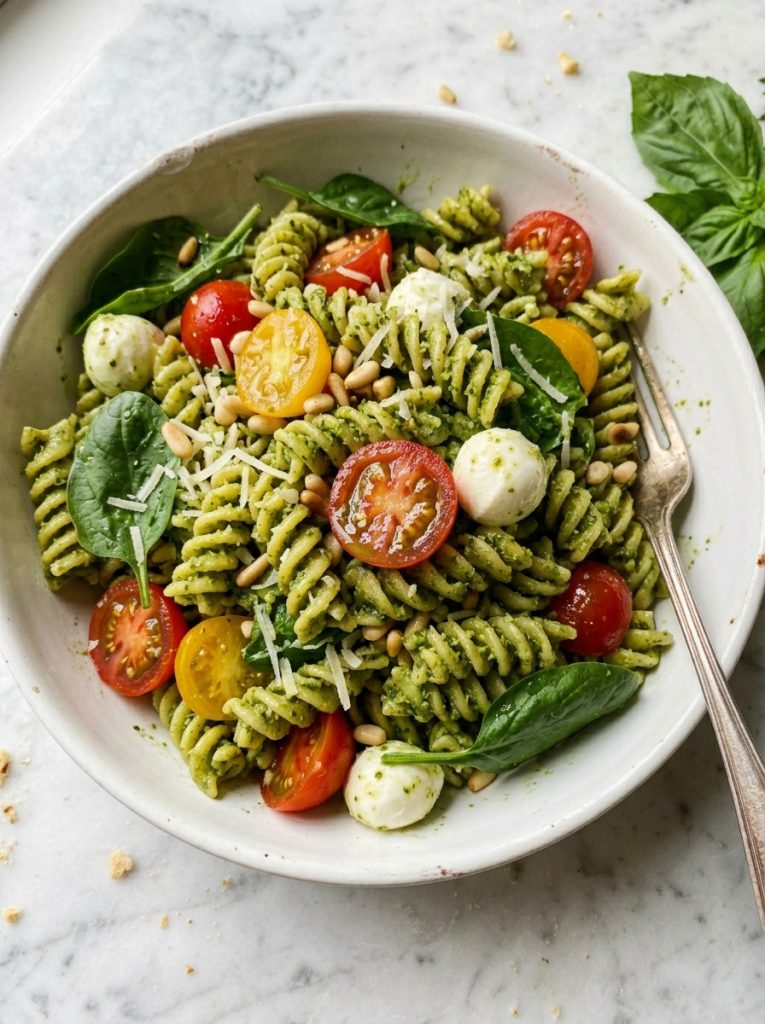
Every single time I bring this to work, someone asks me for the recipe. And honestly? It’s almost embarrassingly easy. Toss cooked pasta with store-bought pesto, a handful of cherry tomatoes, fresh mozzarella, and some baby spinach — that’s essentially it. What makes it special is that the pesto soaks into the pasta overnight and the flavor just deepens.
It’s herbaceous, slightly nutty, creamy from the mozzarella, and the tomatoes add little bursts of sweetness. It genuinely tastes better the next day, which makes it a dream for meal prep.
Ingredients
- 250g rotini or bowtie pasta (these shapes grip the sauce beautifully)
- 4–5 tablespoons basil pesto (store-bought is totally fine)
- 1 cup cherry tomatoes, halved
- 125g fresh mozzarella pearls
- 2 large handfuls of baby spinach
- 2 tablespoons olive oil
- Salt and black pepper to taste
- Optional: 1 grilled chicken breast, sliced; a handful of toasted pine nuts
Process
- Step 1 — Cook the pasta: Boil pasta according to package instructions until just al dente. You want a little bite left — it’ll soften slightly as it soaks up the pesto. Drain and rinse with cold water to stop cooking.
- Step 2 — Toss with olive oil: While the pasta is still slightly warm, toss it with olive oil. This prevents it from clumping together and adds a nice richness.
- Step 3 — Add the pesto: Spoon in the pesto and toss to coat every piece evenly. Start with 4 tablespoons and add more to taste.
- Step 4 — Add the remaining ingredients: Fold in cherry tomatoes, mozzarella pearls, and baby spinach. The spinach will wilt slightly from the warmth of the pasta — that’s fine, it’s delicious that way.
- Step 5 — Season and taste: Add salt and black pepper. Give it one more good toss.
- Step 6 — Chill before serving: Let it sit in the fridge for at least 30 minutes before packing. Overnight is even better.
Occasions
- Weekday work lunches
- Summer potlucks
- Meal prep for 3–4 days
- Casual dinner side dish
Easy Variations
- Add protein: Toss in canned tuna, grilled shrimp, or sliced chicken breast.
- Go vegan: Skip the mozzarella and add white beans or roasted chickpeas instead.
- Swap the pesto: Sun-dried tomato pesto or a walnut-herb pesto works wonderfully too.
3. Mediterranean Chickpea & Orzo Power Salad
Description
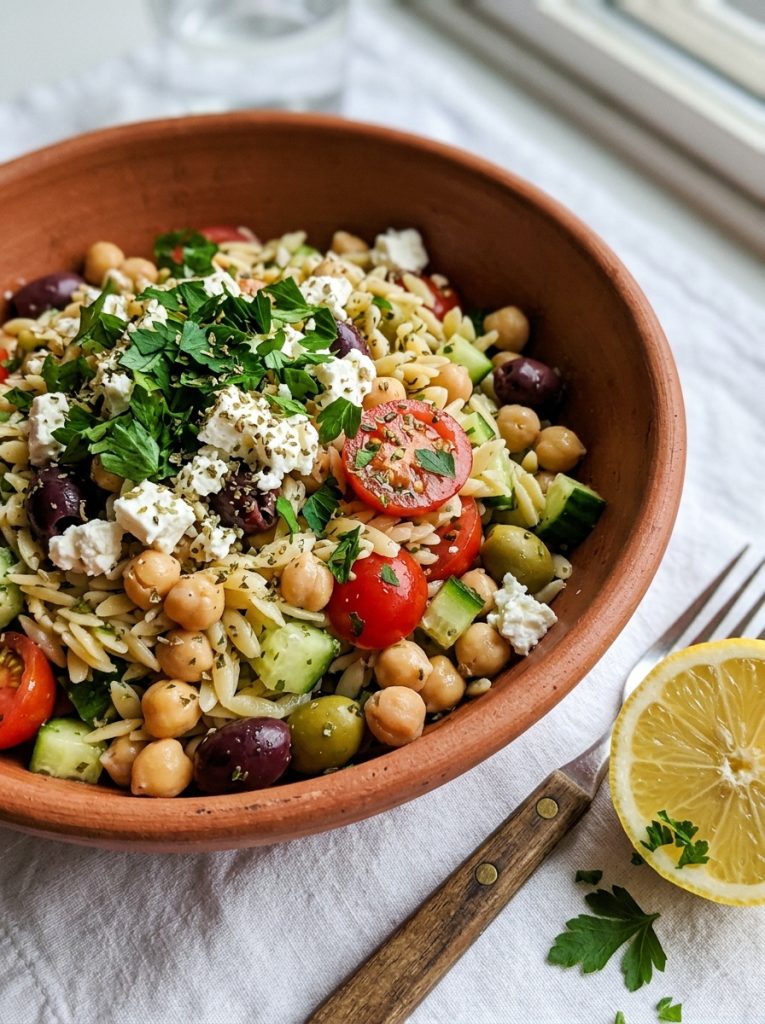
This one has become a genuine staple in my meal prep rotation. There’s something about the combination of chickpeas, briny olives, cool cucumber, and crumbled feta that just hits every note — salty, tangy, hearty, refreshing. The lemony dressing ties it all together with this bright, punchy quality that wakes up every single bite.
It’s packed with protein and fiber, so unlike some “light” lunches, this one actually keeps you full through the whole afternoon. I sometimes add roasted red peppers or artichoke hearts when I want to make it feel a little more special.
Ingredients
- 200g orzo pasta, cooked and cooled
- 1 can (400g) chickpeas, drained and rinsed
- ½ English cucumber, diced
- ½ cup Kalamata olives, halved
- 100g feta cheese, crumbled
- ¼ red onion, finely diced
- 1 cup cherry tomatoes, halved
- Handful of fresh parsley, roughly chopped
For the lemon dressing:
- 3 tablespoons olive oil
- Juice of 1 large lemon
- 1 teaspoon dried oregano
- Salt and black pepper to taste
- ½ teaspoon honey (optional, to balance the tang)
Process
- Step 1 — Cook the orzo: Boil orzo in salted water until al dente, about 8–9 minutes. Drain, rinse with cold water, and set aside.
- Step 2 — Make the dressing: Whisk together olive oil, lemon juice, oregano, salt, pepper, and honey if using. Taste it — it should be bright and a little sharp.
- Step 3 — Combine the salad: In a large bowl, combine orzo, chickpeas, cucumber, olives, cherry tomatoes, and red onion. Pour the dressing over and toss well.
- Step 4 — Add feta and herbs: Fold in the crumbled feta gently (you don’t want it to completely dissolve into the salad) and the fresh parsley.
- Step 5 — Rest before serving: Give it 20–30 minutes in the fridge before packing. The orzo absorbs the dressing and everything melds together beautifully.
Occasions
- Meal prep lunches for the work week
- Mediterranean-themed dinners
- Summer picnics
- Post-workout protein-packed meals
Storage Tip
Store in an airtight container in the fridge for up to 4 days. The salad actually gets better on day 2 as the flavors develop. If it feels a little dry after chilling, add a quick drizzle of olive oil and a fresh squeeze of lemon before serving.
4. Smoky Mustard Potato Salad with Pickles
Description
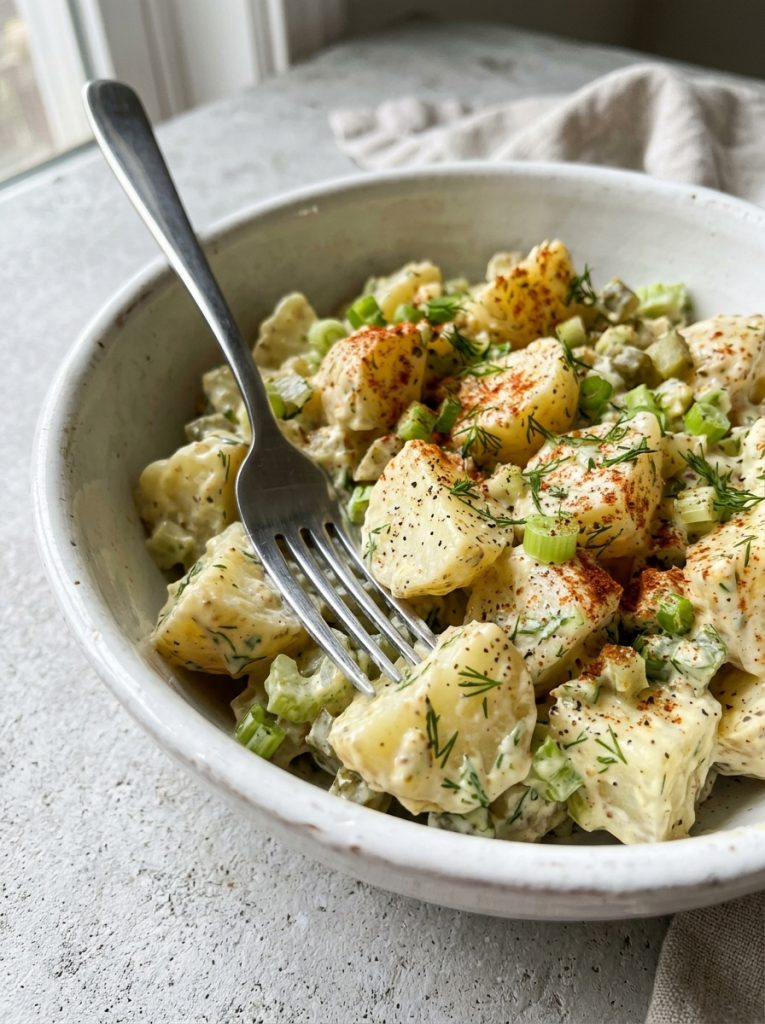
There’s something deeply comforting about a good potato salad. This one has that nostalgic, creamy base — but I’ve added chopped dill pickles and smoked paprika that take it from “classic” to “why is this so good.” The pickles add a tangy crunch and the paprika brings this subtle smokiness that you don’t expect but immediately love.
It’s rich, satisfying, and completely holds up in a lunchbox without going soggy. Make a big batch on Sunday and you’ve got yourself lunch covered for most of the week.
Ingredients
- 800g baby potatoes or Yukon Gold potatoes, cut into bite-sized chunks
- 3 tablespoons mayo
- 1 tablespoon Dijon mustard
- 1 tablespoon apple cider vinegar
- ½ teaspoon smoked paprika (plus extra for garnish)
- 3 dill pickles, finely chopped
- 2 stalks celery, diced
- 3 green onions, sliced
- Salt and black pepper to taste
- Optional: 2 boiled eggs, chopped; 3–4 strips of cooked bacon, crumbled
Process
- Step 1 — Boil the potatoes: Add potatoes to a pot of cold salted water. Bring to a boil and cook until fork-tender, about 12–15 minutes depending on size. Don’t overcook — they should hold their shape. Drain and let cool.
- Step 2 — Make the dressing: In a bowl, whisk together mayo, Dijon mustard, apple cider vinegar, smoked paprika, salt, and pepper.
- Step 3 — Dress the potatoes while warm: Toss the still-warm potatoes with about half the dressing first. Warm potatoes absorb the dressing better and the result is much more flavorful than dressing cold potatoes.
- Step 4 — Add the mix-ins: Fold in the chopped pickles, celery, and green onions. Add the remaining dressing and toss gently.
- Step 5 — Chill: Refrigerate for at least 1 hour before serving. Taste again after chilling and adjust seasoning — cold temperatures dull salt slightly, so it might need a touch more.
- Step 6 — Garnish: Sprinkle a little extra smoked paprika on top before serving.
Occasions
- Work week meal prep
- BBQ side dish
- Picnic or potluck contribution
- Comforting winter lunch
Make-Ahead Tip
This salad is perfect to make the night before. The flavors deepen significantly after a few hours in the fridge. Make it Sunday evening and it’ll be at its best come Monday lunch.
5. Golden Roasted Sweet Potato & Veggie Hash Bowls
Description
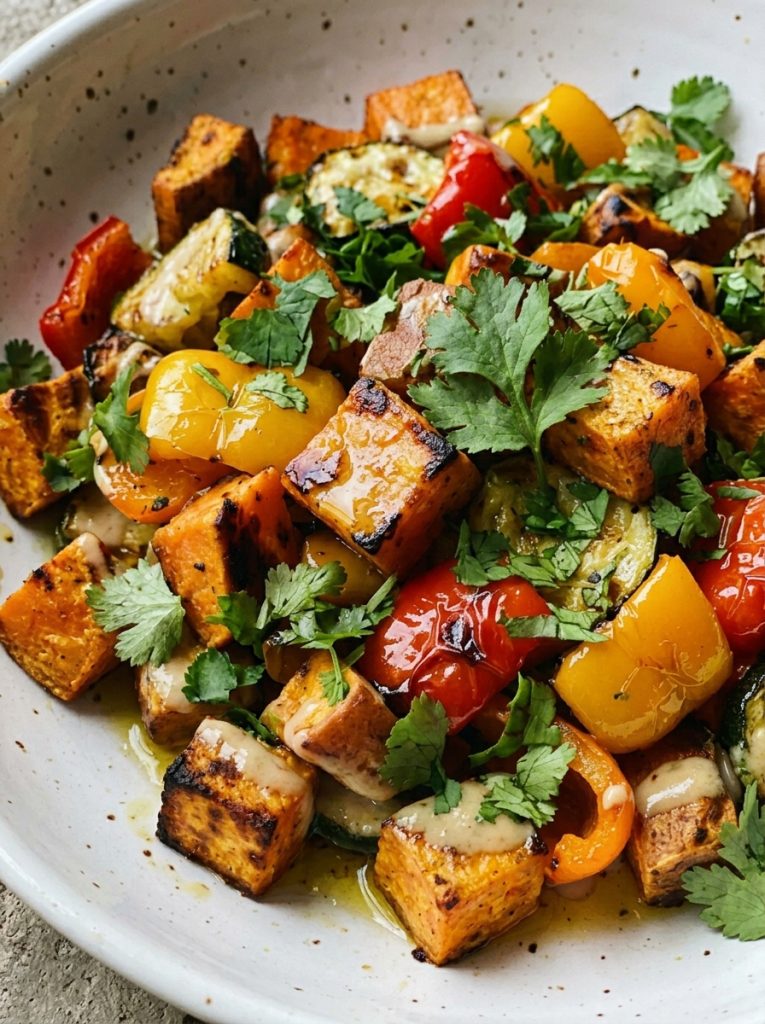
These bowls make me feel like I’m eating something really nourishing — because I am. Cubes of sweet potato roasted until golden and slightly caramelized, tossed with bell peppers, zucchini, and onion. It’s colorful, hearty, and surprisingly satisfying even without any meat. The natural sweetness of the potatoes plays off the savory roasted vegetables in the best way.
I eat this warm, cold, or somewhere in between depending on how my morning goes. All three work. Add chickpeas or grilled chicken if you want a bigger protein punch.
Ingredients
- 2 medium sweet potatoes, peeled and cubed (about 1.5 cm pieces)
- 1 red bell pepper, chopped
- 1 yellow bell pepper, chopped
- 1 zucchini, sliced into half-moons
- 1 medium red onion, cut into wedges
- 3 tablespoons olive oil
- 1 teaspoon garlic powder
- 1 teaspoon smoked paprika
- ½ teaspoon cumin
- Salt and black pepper to taste
- Optional: 1 can chickpeas, drained; fresh parsley or cilantro to finish
Process
- Step 1 — Preheat the oven: Set it to 220°C (425°F). You want high heat for proper caramelization — don’t rush this with a lower temperature.
- Step 2 — Season the vegetables: Toss all the vegetables together with olive oil, garlic powder, smoked paprika, cumin, salt, and pepper. Spread across two baking sheets — don’t overcrowd them, or they’ll steam instead of roast.
- Step 3 — Roast: Roast for 25–30 minutes, flipping halfway through. The sweet potatoes should be fork-tender and the edges should have some golden color. The peppers will soften and blister slightly — that’s exactly what you want.
- Step 4 — Add chickpeas (optional): If adding chickpeas, toss them on the tray for the last 10 minutes of roasting to get them slightly crispy.
- Step 5 — Cool and pack: Let everything cool before portioning into containers. Finish with fresh parsley or cilantro if using.
Occasions
- Vegetarian work lunches
- Post-gym refueling meal
- Meal prep for the full week
- Light weeknight dinner
Serving Ideas
- Serve over a bed of quinoa or brown rice for extra substance.
- Top with a fried egg and hot sauce for a brunch-style bowl.
- Add a dollop of hummus and a squeeze of lemon for a Mediterranean spin.
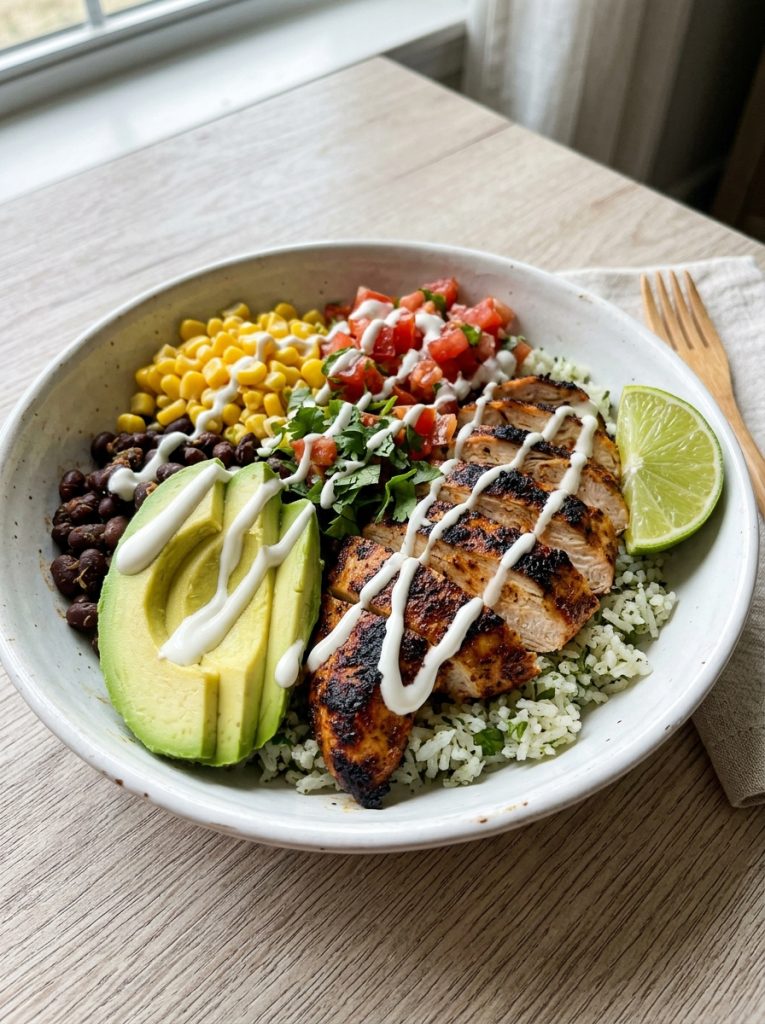
6. Smoky Chipotle Chicken Rice Bowl
Description
This bowl is basically a homemade version of what you’d order at a fast-casual restaurant — and honestly, I think mine is better. Smoky chipotle-marinated chicken over fluffy rice, piled with black beans, corn, fresh salsa, and sliced avocado. It’s bold, satisfying, and holds up beautifully in a lunch container.
The chipotle sauce is the star here. It’s smoky, a little spicy, and slightly sweet — and it makes the chicken incredibly flavorful. I use Greek yogurt instead of sour cream to lighten it up, and you really can’t tell the difference.
Ingredients
- 2 chicken breasts (or thighs for more flavor)
- 2 tablespoons chipotle paste or chipotle sauce
- 1 tablespoon olive oil
- 1 teaspoon garlic powder
- Salt and pepper to taste
- 2 cups cooked rice or quinoa
- 1 can (400g) black beans, drained and rinsed
- 1 cup corn kernels (frozen and thawed is fine)
- 1 avocado, sliced
- ½ cup fresh salsa or pico de gallo
- Greek yogurt or sour cream for topping
- Lime wedges to serve
Process
- Step 1 — Marinate the chicken: Mix chipotle paste, olive oil, garlic powder, salt, and pepper. Coat the chicken and let it marinate for at least 15 minutes (or overnight in the fridge for deeper flavor).
- Step 2 — Cook the chicken: Heat a skillet or grill pan over medium-high heat. Cook the chicken for about 6–7 minutes per side until cooked through and slightly charred. Let it rest for 5 minutes before slicing.
- Step 3 — Warm the beans and corn: In a small pan, heat black beans and corn with a pinch of cumin and salt until warmed through. This takes 3–4 minutes.
- Step 4 — Assemble the bowls: Start with a base of rice or quinoa. Layer on the sliced chicken, beans, corn, avocado, and salsa.
- Step 5 — Top and finish: Add a spoonful of Greek yogurt and a squeeze of fresh lime. Pack the toppings separately if prepping ahead to keep everything fresh.
Occasions
- Tex-Mex inspired work lunches
- Meal prep bowls for 3–4 days
- Casual weeknight dinner
- Post-workout high-protein meal
Common Mistake
Don’t slice the chicken immediately after cooking. Let it rest for at least 5 minutes — cutting too soon lets all the juices run out and you end up with dry chicken. Resting makes all the difference.
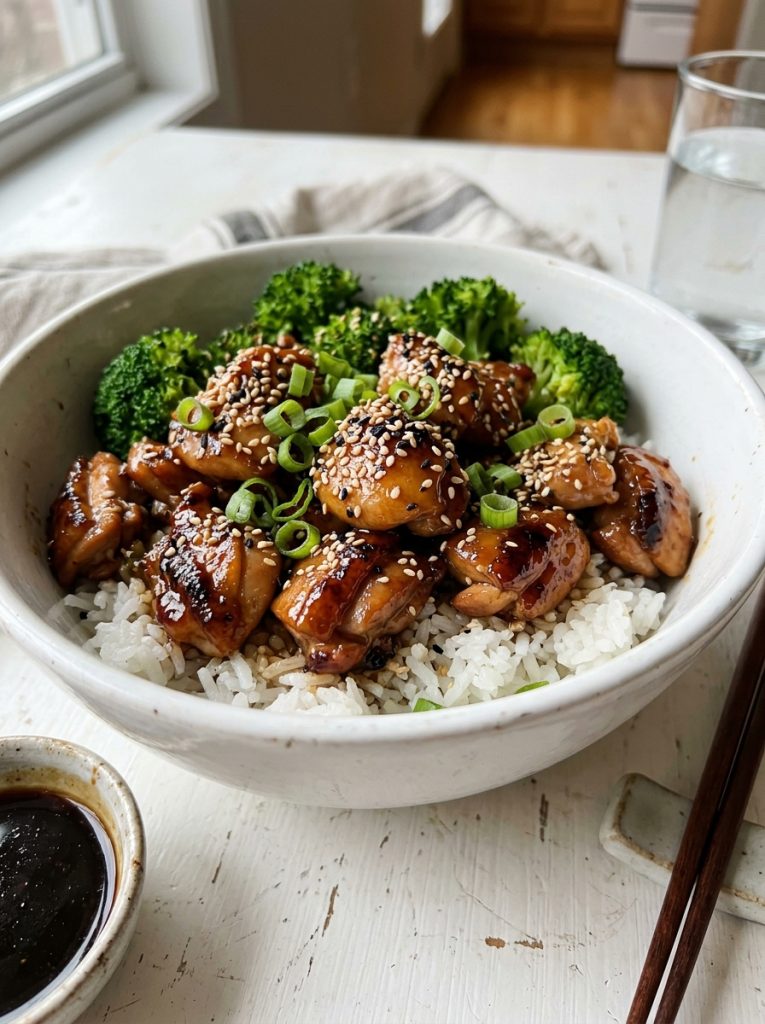
7. Honey Garlic Teriyaki Chicken Rice Bowl
Description
Sweet, sticky, savory — this is comfort food that also happens to be meal-prep friendly. The homemade teriyaki sauce takes literally five minutes and tastes so much better than anything from a bottle. Once you try it, you won’t go back. The chicken soaks it all up beautifully, and served over rice with steamed broccoli, it’s the kind of lunch that makes everyone at the office ask what you’re eating.
The sauce clings to everything — the chicken, the rice, even the broccoli — so every forkful is flavored. I’ve made this probably 30 times by now. No exaggeration.
Ingredients
For the chicken and rice:
- 2 chicken breasts or thighs, cut into bite-sized pieces
- 2 cups cooked white or brown rice
- 2 cups broccoli florets
- 1 cup edamame or shredded carrots (optional)
- 1 tablespoon oil for cooking
- Sesame seeds and green onions to garnish
For the teriyaki sauce:
- 3 tablespoons soy sauce
- 2 tablespoons honey
- 1 tablespoon rice vinegar
- 2 cloves garlic, minced
- 1 teaspoon fresh ginger, grated (or ½ teaspoon ground ginger)
- 1 teaspoon cornstarch mixed with 1 tablespoon cold water (to thicken)
Process
- Step 1 — Make the teriyaki sauce: In a small saucepan, combine soy sauce, honey, rice vinegar, garlic, and ginger. Bring to a gentle simmer over medium heat. Add the cornstarch slurry and stir until the sauce thickens, about 1–2 minutes. Remove from heat.
- Step 2 — Cook the chicken: Heat oil in a skillet over medium-high heat. Add chicken pieces and cook for 5–6 minutes, turning occasionally, until golden and cooked through.
- Step 3 — Glaze the chicken: Pour most of the teriyaki sauce over the cooked chicken. Toss to coat and let it caramelize slightly in the pan for 1–2 minutes.
- Step 4 — Steam the broccoli: Steam or microwave broccoli until just tender, about 3–4 minutes. Season lightly with salt.
- Step 5 — Assemble: Portion rice into containers. Top with the glazed chicken, broccoli, and edamame or carrots if using. Drizzle the remaining sauce over the top.
- Step 6 — Garnish: Scatter sesame seeds and sliced green onions before closing the lid.
Occasions
- Weekly work lunch prep
- Quick weeknight dinner
- Lunchbox for teenagers
- Family meal prep night
Quick Tips
- Double the sauce. It keeps in the fridge for a week and you’ll want to drizzle it on everything.
- Don’t overcrowd the pan when cooking the chicken — crowding causes steaming instead of browning. Work in batches if needed.
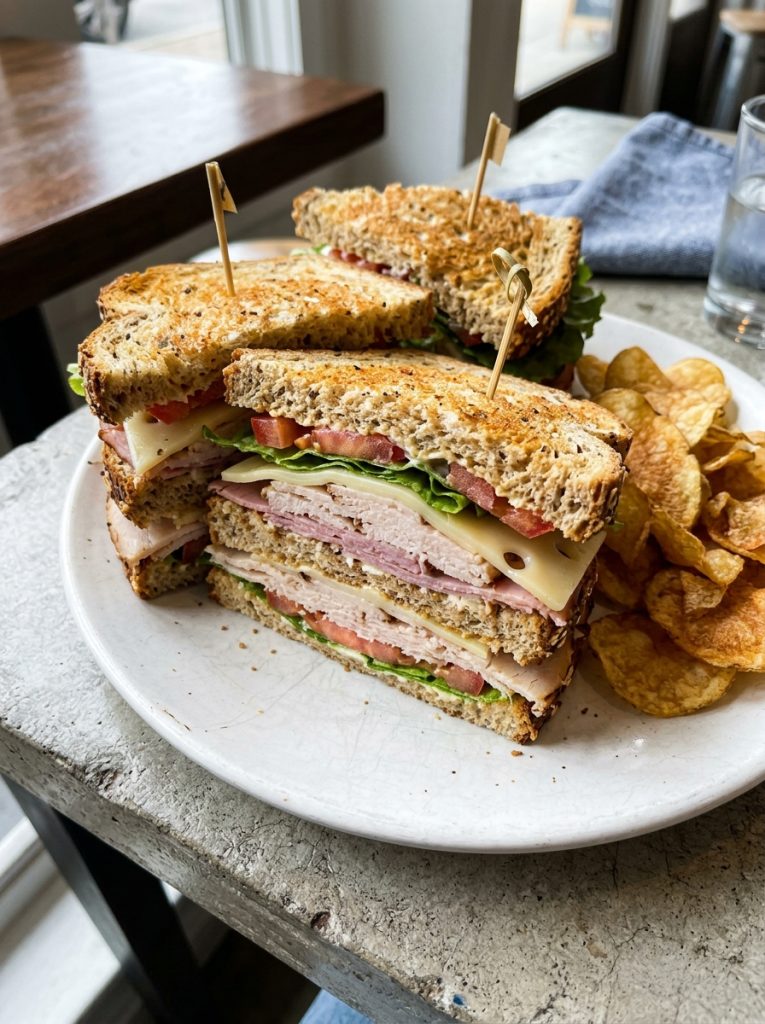
8. Toasted Swiss & Turkey Club Sandwich
Description
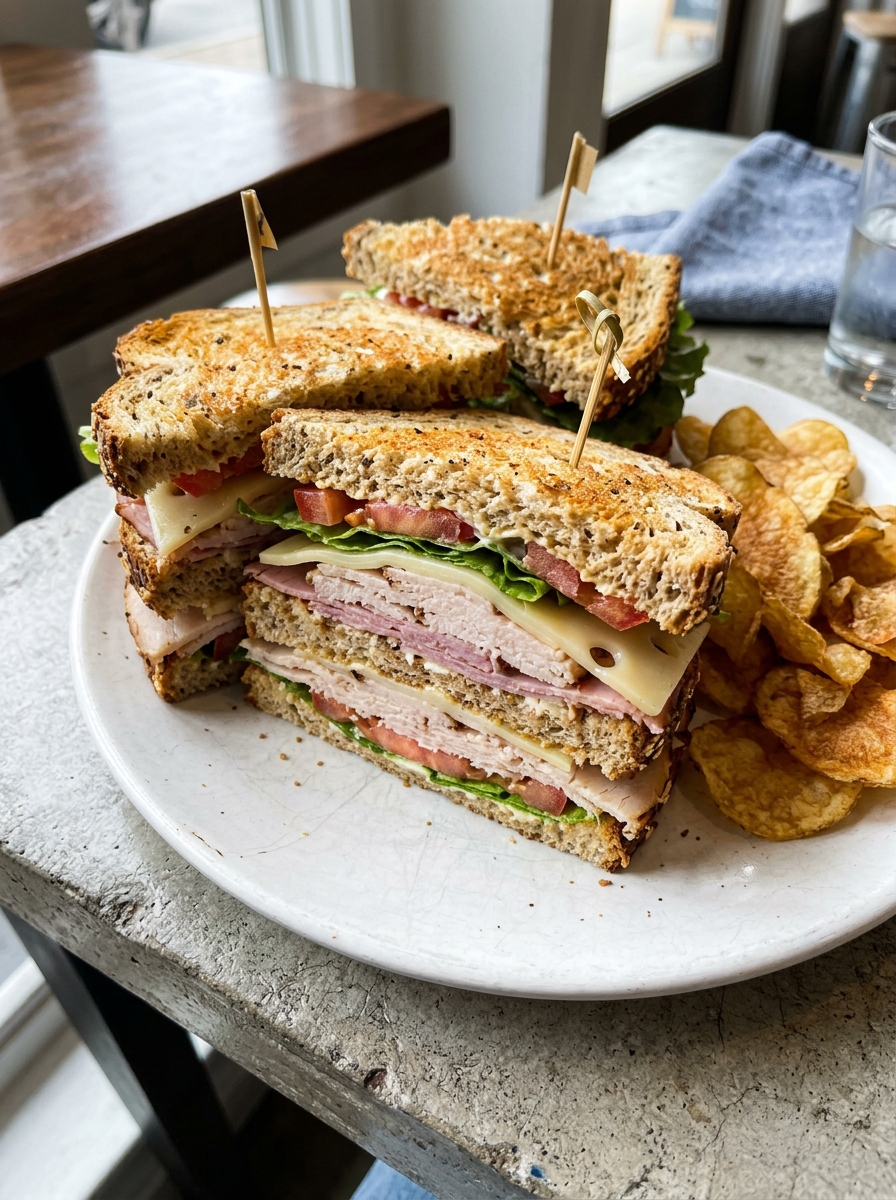
Some things are classics for a reason, and this sandwich is one of them. I’ve given it a little upgrade — toasted whole-grain bread, a proper layer of turkey and ham, Swiss cheese, crispy lettuce, ripe tomato, and a swipe of good mayo. The toasting is non-negotiable for me. It adds this slight crunch that makes the whole thing feel less like a sad packed lunch and more like something from a café.
I wrap mine in parchment paper before packing it. It sounds extra but it genuinely keeps it together better — and unwrapping it at your desk feels weirdly satisfying.
Ingredients
- 3 slices whole-grain or sourdough bread per sandwich
- 3–4 slices good quality turkey breast
- 2–3 slices ham
- 2 slices Swiss cheese (or Gruyère if you’re feeling fancy)
- 2–3 leaves romaine or butter lettuce
- 2 slices ripe tomato
- 2 tablespoons mayo
- 1 teaspoon Dijon mustard
- Salt and black pepper to taste
- Optional: 2 slices cooked bacon
Process
- Step 1 — Toast the bread: Toast all three slices until golden. This is the move that elevates the whole sandwich — don’t skip it.
- Step 2 — Spread the condiments: Mix mayo and Dijon together and spread it generously on all three slices of toast.
- Step 3 — Build the first layer: On the first slice, layer ham, one slice of cheese, and lettuce.
- Step 4 — Add the second slice: Place the second piece of toast on top (condiment side up), then layer turkey, the second slice of cheese, tomato, and season the tomato lightly with salt and pepper.
- Step 5 — Top and press: Place the final slice of toast on top. Press down gently.
- Step 6 — Cut and wrap: Cut diagonally (always diagonally — it just tastes better) and wrap tightly in parchment paper for transport.
Occasions
- Classic weekday work lunch
- Kids’ school lunchboxes
- Casual weekend brunch
- Quick family dinner
Serving Ideas
- Serve alongside a simple green salad or a handful of kettle chips for a proper lunch spread.
- Add a thin layer of avocado for a creamy upgrade.
- Swap the mayo for a garlic aioli when you want something a little more exciting.
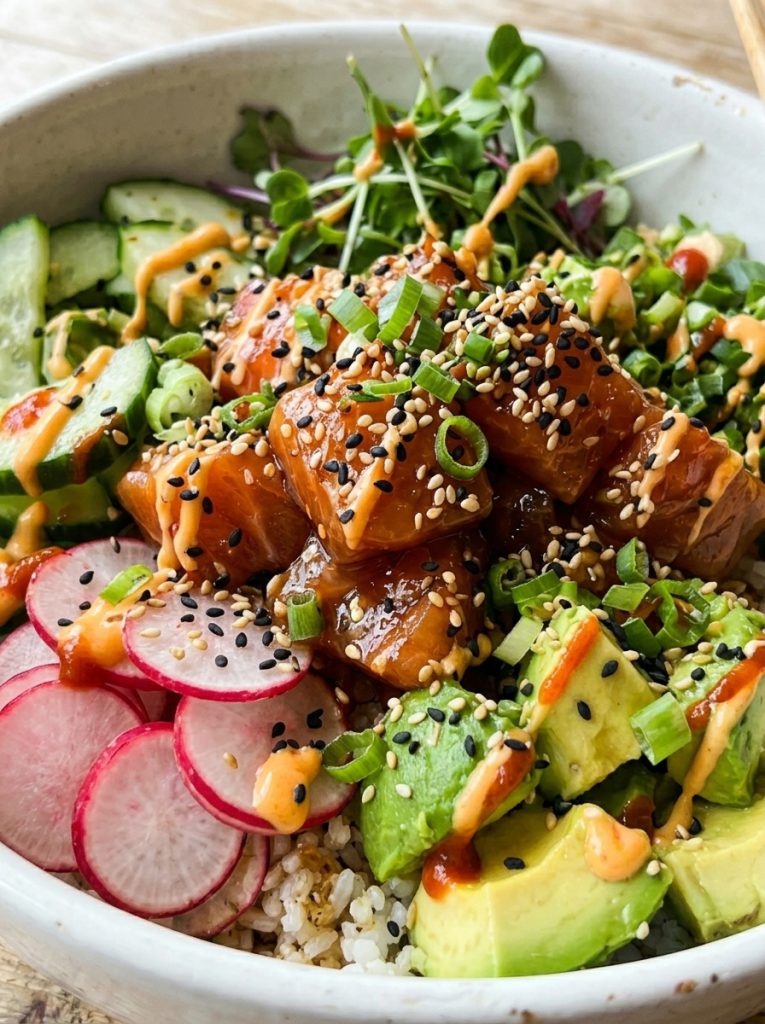
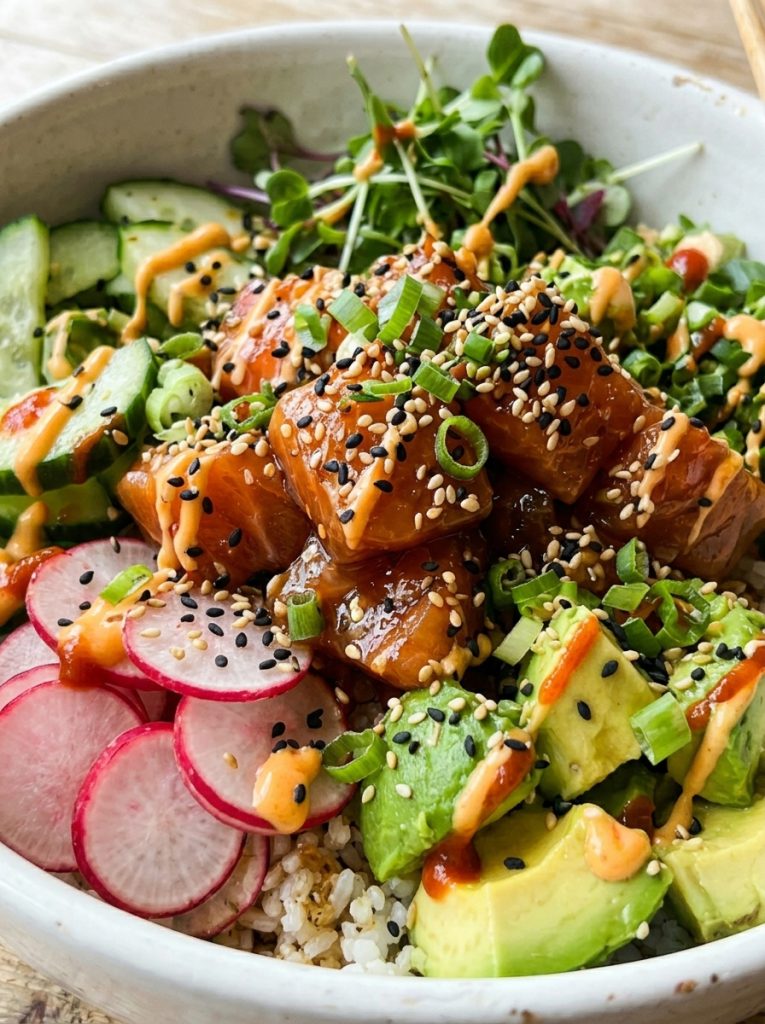
9. Spicy Sesame Salmon Poke Bowl
Description
I was intimidated by poke bowls for a long time — mostly because of the raw fish component. Once I finally tried making one at home, I realized it’s one of the easiest lunches you can put together if you buy sushi-grade salmon. The combination of silky salmon, creamy avocado, crisp cucumber, and spicy sesame dressing over rice is just chef’s kiss.
It’s fresh, filling, and genuinely feels like a treat. You can prep all the components ahead and assemble at lunch so nothing gets soggy. Or if raw salmon isn’t your thing, cooked shrimp or even tofu works brilliantly with the same dressing.
Ingredients
For the bowl:
- 200g sushi-grade salmon, cut into 1.5cm cubes
- 2 cups cooked sushi rice or short-grain white rice
- 1 avocado, diced
- ½ English cucumber, thinly sliced
- 3–4 radishes, thinly sliced
- 2 green onions, sliced
- Toasted sesame seeds to garnish
- Nori strips (optional)
For the spicy sesame marinade:
- 2 tablespoons soy sauce
- 1 teaspoon sesame oil
- 1–2 teaspoons sriracha (adjust to your heat preference)
- 1 teaspoon rice vinegar
- ½ teaspoon honey
Process
- Step 1 — Make the marinade: Whisk together soy sauce, sesame oil, sriracha, rice vinegar, and honey in a bowl.
- Step 2 — Marinate the salmon: Add the cubed salmon to the marinade. Toss gently to coat and let it sit for 10–15 minutes. Don’t leave it much longer — the acid will start to “cook” the fish and change the texture.
- Step 3 — Prepare the rice: Season your cooked rice with a splash of rice vinegar and a pinch of salt. Stir and let it cool to room temperature before assembling.
- Step 4 — Prepare the vegetables: Slice cucumber, avocado, radishes, and green onions. Keep the avocado in lemon water if preparing ahead to prevent browning.
- Step 5 — Assemble: Spoon rice into a bowl or container. Arrange salmon, avocado, cucumber, and radishes on top. Drizzle any remaining marinade over the bowl.
- Step 6 — Garnish: Scatter sesame seeds, green onions, and nori strips on top. Serve immediately or keep components separate until ready to eat.
Occasions
- Impressive weekday work lunch
- Light summer dinner
- Meal prep for 1–2 days (keep salmon and toppings separate)
- Entertaining guests casually
Quick Tips
- Only use sushi-grade salmon. Regular supermarket salmon isn’t safe to eat raw — ask your fishmonger specifically for sashimi or poke-grade fish.
- Prep components separately if making ahead. Dress the salmon right before eating for the freshest texture.
10. Soy-Seared Tuna Mayo Onigiri (Japanese Rice Balls)
Description
These are the lunch I bring when I want something a little different — something that makes me actually excited to open my lunchbox. Onigiri are Japanese rice balls, and they’re so much more delicious than they sound. Compact, savory, portable, and endlessly customizable. The tuna mayo filling is my absolute favorite — creamy, slightly salty, tucked inside soft sticky rice. The soy-seared version takes it up a notch.
They hold together surprisingly well in a lunchbox and they don’t get soggy the way sandwiches can. Plus, making them is kind of fun — it’s satisfying to shape something with your hands.
Ingredients
- 2 cups Japanese short-grain rice, cooked according to packet directions
- 2 tablespoons rice vinegar
- 1 pinch salt
For tuna mayo filling:
- 1 can (120g) tuna in water, drained
- 2 tablespoons Japanese mayo (Kewpie if you can find it — it’s worth it)
- 1 teaspoon soy sauce
- Black pepper to taste
For searing (optional but recommended):
- 1 tablespoon soy sauce
- 1 teaspoon sesame oil
- 1 tablespoon butter or neutral oil
To finish:
- 4–6 sheets nori (dried seaweed), cut into strips
Process
- Step 1 — Season the rice: While still warm, fold rice vinegar and a pinch of salt through the cooked rice. Fan it gently and let it cool until it’s comfortable to handle — still warm but not steaming.
- Step 2 — Make the tuna mayo filling: Mix drained tuna with Japanese mayo, soy sauce, and black pepper. Taste and adjust.
- Step 3 — Wet your hands: Before shaping, wet your hands with water and sprinkle a little salt on your palms. This prevents sticking and seasons the outside of the rice.
- Step 4 — Shape the onigiri: Take a generous handful of rice (about ¾ cup) and flatten it in your palm. Add a heaped tablespoon of filling in the center. Cup your hands and press the rice firmly around the filling, then shape into a triangle or ball by pressing firmly with both hands.
- Step 5 — Sear (optional): In a pan over medium-high heat, combine soy sauce, sesame oil, and butter. Place onigiri in the pan and sear each side for 2–3 minutes until slightly golden and glazed. This is optional but absolutely delicious.
- Step 6 — Wrap in nori: Wrap a strip of nori around the base of each onigiri just before eating to keep it crispy.
Occasions
- Portable work lunch on busy days
- Kids’ lunchboxes — they love the novelty
- Japanese-inspired dinner starter
- On-the-go snack
Easy Variations
- Swap the filling: Try pickled plum (umeboshi), leftover grilled salmon, or cheese and kimchi.
- Make it vegetarian: Fill with avocado, edamame paste, or seasoned shiitake mushrooms.
- Skip the searing for a simpler version — they’re just as good eaten fresh.
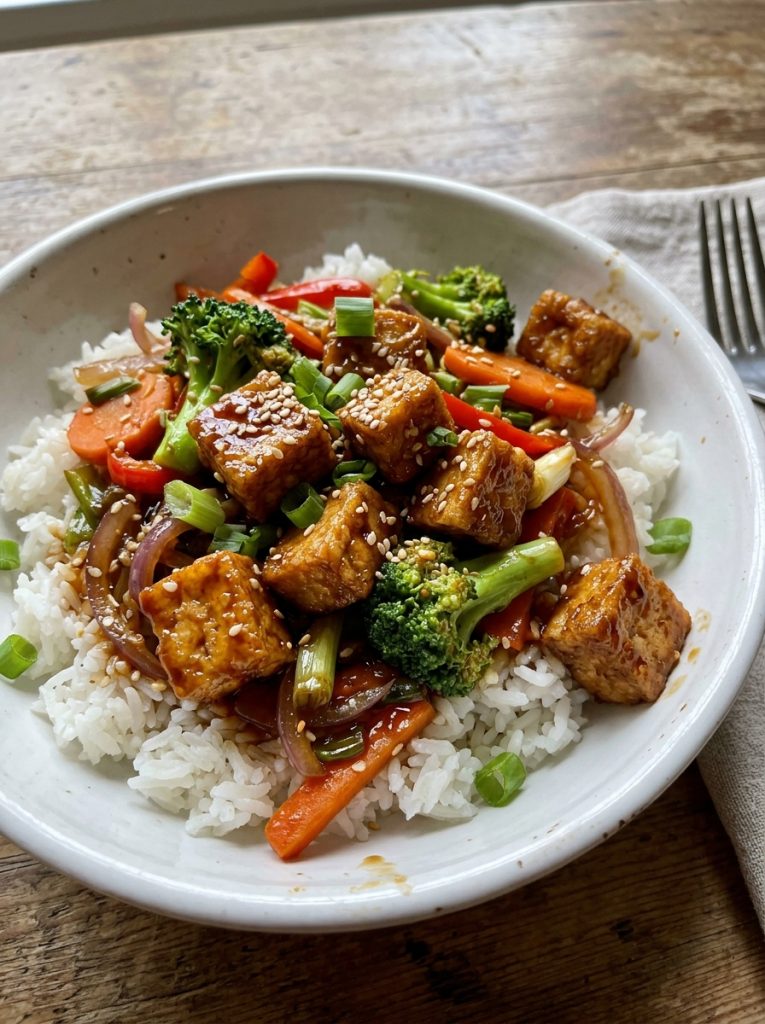
11. Crispy Ginger-Glazed Tofu & Veggie Stir-Fry Box
Description
I used to be the person who thought tofu was boring. And then I learned the secret: you have to press it, cube it, and cook it until it’s properly golden and crispy. That changes everything. Combined with a quick soy-ginger glaze and a rainbow of stir-fried vegetables, this becomes one of my favorite plant-based meals to prep for the week.
It’s deeply savory, satisfying, and reheats beautifully. The sauce clings to the tofu in that sticky, flavorful way that makes every bite interesting. Serve it over rice or noodles depending on what you have on hand.
Ingredients
- 400g firm tofu, pressed and cut into 2cm cubes
- 1 tablespoon cornstarch (for coating the tofu)
- 2 tablespoons neutral oil
- 1 cup broccoli florets
- 1 large carrot, julienned or thinly sliced
- 1 red bell pepper, sliced
- 2 cups cooked rice or noodles to serve
For the soy-ginger glaze:
- 3 tablespoons soy sauce
- 1 tablespoon sesame oil
- 1 tablespoon honey or maple syrup
- 1 teaspoon fresh ginger, grated
- 2 cloves garlic, minced
- 1 teaspoon cornstarch mixed with 2 tablespoons water
Process
- Step 1 — Press the tofu: Wrap the tofu block in a clean towel and press it under a heavy pot for 20–30 minutes. This removes excess water and is the key to getting it crispy — don’t skip this.
- Step 2 — Cube and coat: Cut pressed tofu into cubes. Toss lightly in cornstarch — just enough to coat. This creates a slightly crispy shell when pan-fried.
- Step 3 — Pan-fry the tofu: Heat oil in a skillet or wok over medium-high heat. Add tofu in a single layer. Cook for 3–4 minutes per side until golden and slightly crispy. Don’t move it around — let it sit and form a crust. Remove and set aside.
- Step 4 — Make the glaze: In the same pan, add a touch more oil. Combine soy sauce, sesame oil, honey, ginger, and garlic in a small bowl. Pour into the hot pan and add the cornstarch slurry. Stir and cook for 1–2 minutes until it thickens and becomes glossy.
- Step 5 — Stir-fry the vegetables: Add broccoli, carrot, and bell pepper to the pan. Stir-fry for 3–4 minutes until just tender but still with some bite.
- Step 6 — Combine: Return the tofu to the pan. Toss everything together in the glaze until evenly coated.
- Step 7 — Serve: Portion over rice or noodles.
Occasions
- Vegetarian or vegan weekday work lunches
- Meat-free Monday dinners
- Post-gym protein meal
- Meal prep for 3–4 days
Common Mistake
Not pressing the tofu long enough is the number one mistake people make. Under-pressed tofu holds too much water, which means it steams in the pan instead of crisping up. 20–30 minutes of pressing makes a huge difference. If you’re in a rush, buy pre-pressed or extra-firm tofu.
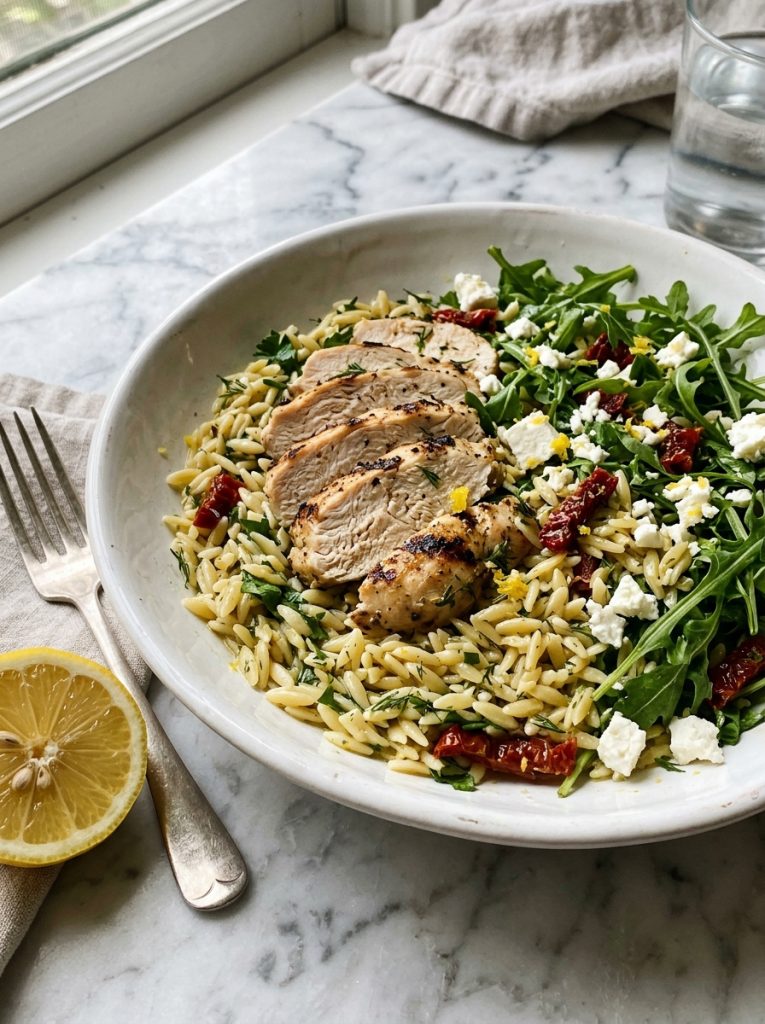
12. Zesty Lemon Herb Chicken & Orzo Salad
Description
This is my “impress without trying” lunch. It sounds and looks like you went to real effort, but it actually comes together in about 20 minutes. The tiny orzo grains soak up the lemon herb dressing completely, the chicken adds protein and substance, and a handful of fresh arugula or spinach keeps it from feeling heavy.
It’s wonderful warm or cold, which makes it perfect for those unpredictable work days when you might eat at your desk at 11:30 or not until 2pm. Both temperature scenarios taste great. I sometimes add feta and sun-dried tomatoes when I want a Mediterranean feel.
Ingredients
- 1.5 cups dry orzo pasta
- 2 chicken breasts, grilled or pan-fried and sliced
- 2 large handfuls baby arugula or spinach
- ½ cup fresh parsley, chopped
- ½ cup fresh basil leaves, torn
- ½ cup sun-dried tomatoes, roughly chopped (optional)
- 80g feta cheese, crumbled (optional)
For the lemon herb dressing:
- 4 tablespoons olive oil
- Juice and zest of 1 lemon
- 1 teaspoon Dijon mustard
- 1 small clove garlic, minced
- 1 teaspoon dried oregano
- Salt and black pepper to taste
Process
- Step 1 — Cook the orzo: Boil orzo in well-salted water for 8–9 minutes until just al dente. Drain and rinse under cold water.
- Step 2 — Make the dressing: Whisk together olive oil, lemon juice and zest, Dijon mustard, garlic, oregano, salt, and pepper. Taste — it should be bright and punchy.
- Step 3 — Season the chicken: If cooking fresh, season chicken with salt, pepper, a drizzle of olive oil, and a pinch of garlic powder. Pan-fry over medium-high heat for 6–7 minutes per side. Let it rest 5 minutes before slicing.
- Step 4 — Dress the orzo: While the orzo is still slightly warm, pour three-quarters of the dressing over it and toss well. It’ll absorb beautifully.
- Step 5 — Combine: Add arugula, parsley, basil, sun-dried tomatoes, and feta if using. Toss gently — the arugula will wilt slightly from the warm orzo, which is lovely.
- Step 6 — Top with chicken: Arrange the sliced chicken on top and drizzle with the remaining dressing.
Occasions
- Elegant-feeling weekday work lunches
- Light summer dinner
- Dinner party starter or side
- Meal prep that feels restaurant-worthy
Make-Ahead Tip
Make the orzo and dressing up to 2 days ahead. Store the arugula separately to keep it from wilting. Add the greens and the sliced chicken right before packing for the freshest result.
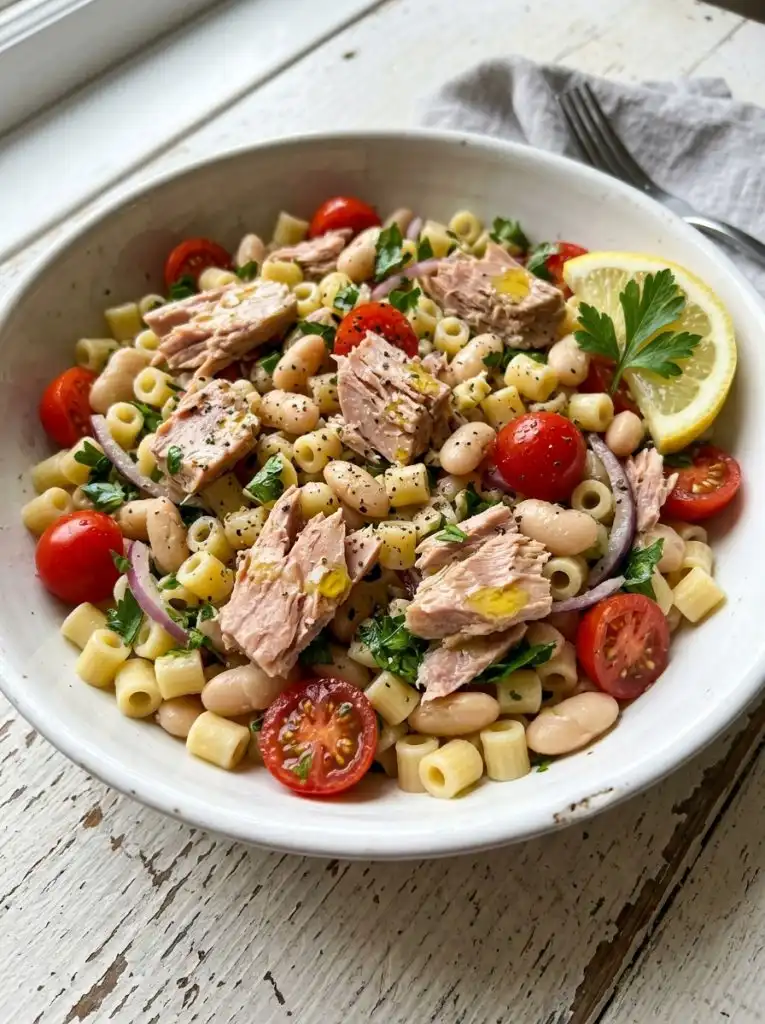
13. Classic Tuna & White Bean Pasta Salad
Description
This one might be the simplest lunch in this whole post, and that’s honestly why I love it. Tuna, white beans, pasta, a zingy lemon-caper dressing — it’s straightforward, cheap to make, and incredibly satisfying. The white beans bulk it up with protein and fiber, and the capers add this briny, punchy quality that makes the whole thing taste way more sophisticated than it has any right to.
I make a massive batch of this on Sundays and it genuinely gets me through Tuesday without a second thought. No reheating needed, no fuss.
Ingredients
- 200g penne or fusilli pasta, cooked and cooled
- 2 cans (120g each) tuna in olive oil, drained
- 1 can (400g) white cannellini beans, drained and rinsed
- ½ red onion, very finely sliced
- 2 tablespoons capers, roughly chopped
- ½ cup cherry tomatoes, halved
- Fresh flat-leaf parsley, chopped
For the lemon-caper dressing:
- 3 tablespoons olive oil
- Juice of 1 lemon
- 1 teaspoon white wine vinegar
- Salt and black pepper to taste
- Pinch of chilli flakes (optional)
Process
- Step 1 — Cook the pasta: Boil pasta in salted water until al dente. Drain and rinse under cold water. Toss with a drizzle of olive oil to prevent clumping.
- Step 2 — Soak the red onion: Soak the sliced red onion in cold water for 10 minutes, then drain. This takes the raw sharpness off while keeping the flavor and crunch.
- Step 3 — Make the dressing: Whisk olive oil, lemon juice, white wine vinegar, salt, pepper, and chilli flakes together.
- Step 4 — Combine everything: In a large bowl, toss together the pasta, tuna (breaking it into large flakes), white beans, capers, tomatoes, and soaked red onion. Pour the dressing over and mix well.
- Step 5 — Add the fresh herbs: Fold in the parsley last so it stays bright and fresh.
- Step 6 — Chill and taste again: Refrigerate for at least 30 minutes. The flavors develop as it sits. Taste before serving and add more lemon or salt as needed.
Occasions
- Effortless weekday work lunches
- Mediterranean summer picnic
- No-cook dinner on a hot evening
- Budget-friendly meal prep for the week
Storage Tip
Keeps beautifully in an airtight container for up to 3 days. If it looks dry after chilling, add a splash of olive oil and a squeeze of lemon before serving — that freshens it right back up.
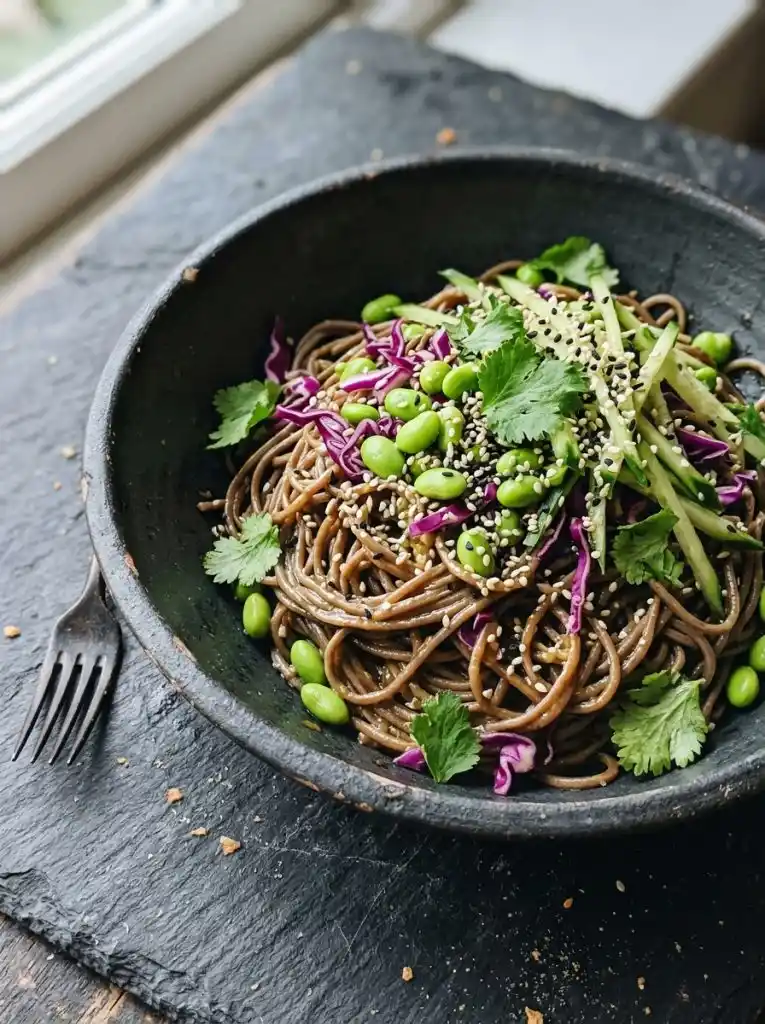
14. Ginger Miso Noodle Salad with Edamame
Description
Cold noodle salads are massively underrated for meal prep, and this one is my favorite in the genre. Soba or rice noodles tossed in a deeply savory, slightly sweet ginger miso dressing, with edamame, shredded purple cabbage, cucumber, and a shower of sesame seeds. It’s light but filling, endlessly flavorful, and holds its texture better than almost any other pasta-based lunch.
The dressing is the thing here — miso gives it this rich, umami depth that makes it taste like it came from a really good restaurant. I eat it cold, straight from the container, and it’s one of my happiest desk lunch moments.
Ingredients
- 200g soba noodles or rice noodles
- 1 cup edamame beans (frozen and thawed)
- 1 cup purple cabbage, finely shredded
- 1 English cucumber, cut into thin matchsticks
- 2 green onions, thinly sliced
- 2 tablespoons toasted sesame seeds
- Optional: 1 carrot, julienned; fresh coriander leaves
For the ginger miso dressing:
- 2 tablespoons white miso paste
- 2 tablespoons soy sauce
- 1 tablespoon rice vinegar
- 1 tablespoon sesame oil
- 1 tablespoon honey or maple syrup
- 1 teaspoon fresh ginger, grated
- 1 clove garlic, minced
- 2–3 tablespoons warm water to thin to pouring consistency
Process
- Step 1 — Cook the noodles: Cook soba noodles according to packet directions — usually 4–5 minutes. Drain immediately and rinse thoroughly under cold water. This stops cooking and prevents clumping. Toss with a small drizzle of sesame oil.
- Step 2 — Make the dressing: Whisk together miso paste, soy sauce, rice vinegar, sesame oil, honey, ginger, and garlic. Add warm water gradually until the dressing pours easily. Taste — it should be deeply savory with a hint of sweetness and ginger warmth.
- Step 3 — Prepare the vegetables: Shred cabbage, julienne cucumber, and prepare any other vegetables.
- Step 4 — Toss everything together: Combine noodles, edamame, cabbage, and cucumber in a large bowl. Pour the dressing over and toss thoroughly to coat.
- Step 5 — Portion and garnish: Divide into containers. Top with green onions, sesame seeds, and coriander if using.
- Step 6 — Chill: Refrigerate for at least 20 minutes before serving. The noodles absorb the dressing as they sit — absolutely delicious.
Occasions
- Refreshing summer work lunches
- Asian-inspired dinner prep
- Light meal after heavy weekend eating
- Vegetarian and vegan-friendly meal prep
Easy Variations
- Add protein: Top with sliced grilled chicken, soft-boiled egg, or pan-seared tofu.
- Make it spicy: Add a teaspoon of chilli garlic paste or a drizzle of sriracha to the dressing.
- Go fully gluten-free: Use rice noodles and tamari instead of soba and soy sauce.
A Final Note
After going through all of these recipes, I keep coming back to one simple truth — a great work lunch doesn’t need to be complicated, it just needs a little bit of intention. Whether it’s a bowl you threw together in 15 minutes or a salad you spent Sunday afternoon perfecting, eating something you actually made and actually enjoy makes such a difference to the whole workday. Try one this week. You might just become a meal-prep convert. 🥗