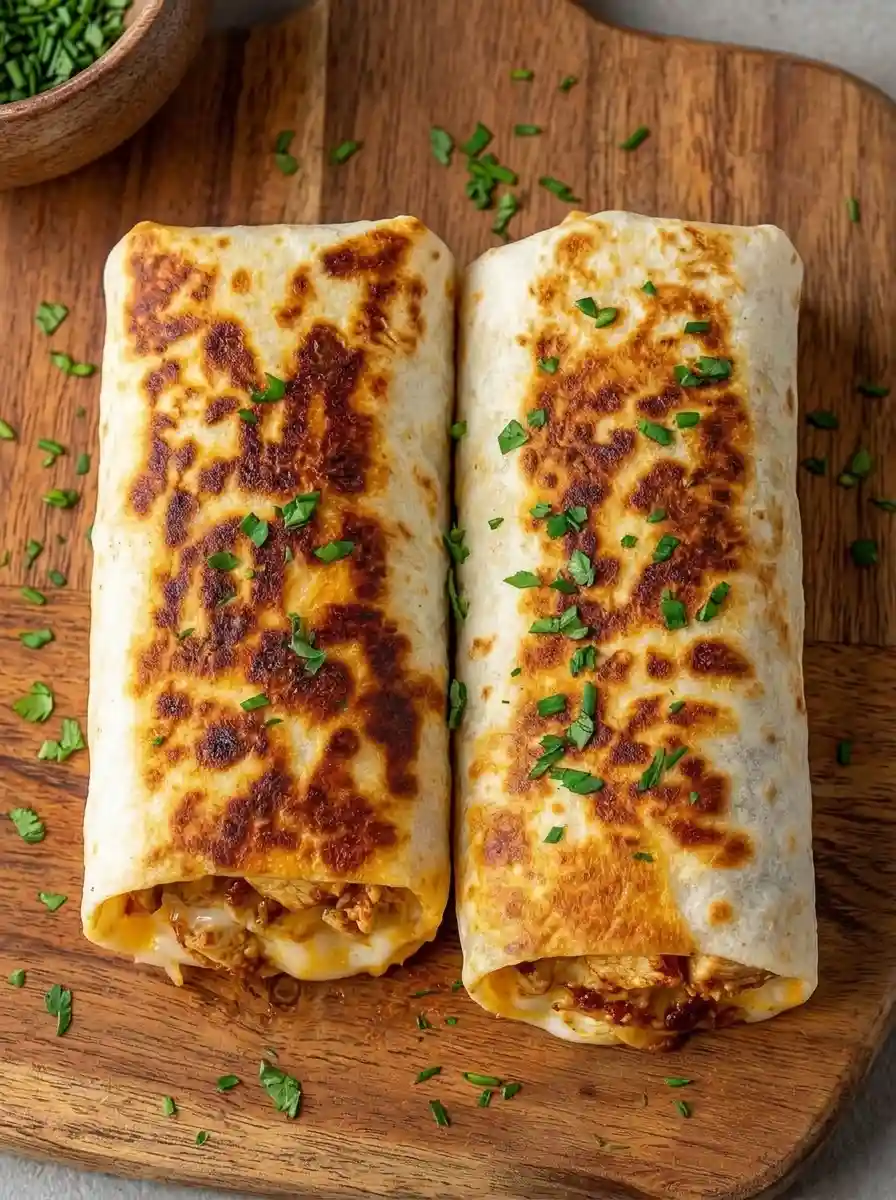
27 Budget Dinners That Don’t Taste Cheap
Looking for budget dinner ideas that don’t taste cheap? You are not alone. Searches for “cheap meals that taste expensive” are up 200% since 2023. You want to save money on groceries but you are tired of bland chicken, soggy vegetables, and yet another night of buttered noodles. These 27 recipes come from the most pinned and most saved budget dinners across Pinterest, TikTok, YouTube, and top food blogs from 2023 to 2026. Most are ready in under 35 minutes. Let us get into it.
Why You Will Love This List
- ⏱️ Most meals in under 35 minutes. Fast enough for weeknights.
- 🥬 Dietary flags on every recipe. Gluten free, dairy free, vegan, and low carb options are clearly marked.
- 🌍 Tested across 5 markets. Ingredients are available in the US, Canada, UK, Australia, and New Zealand.
- 💰 No specialty equipment. Just a skillet, a sheet pan, or a pot.
- 🔁 Meal prep friendly. Storage and reheating notes are included for every dish.
1. Garlic Parmesan Chicken Skillet
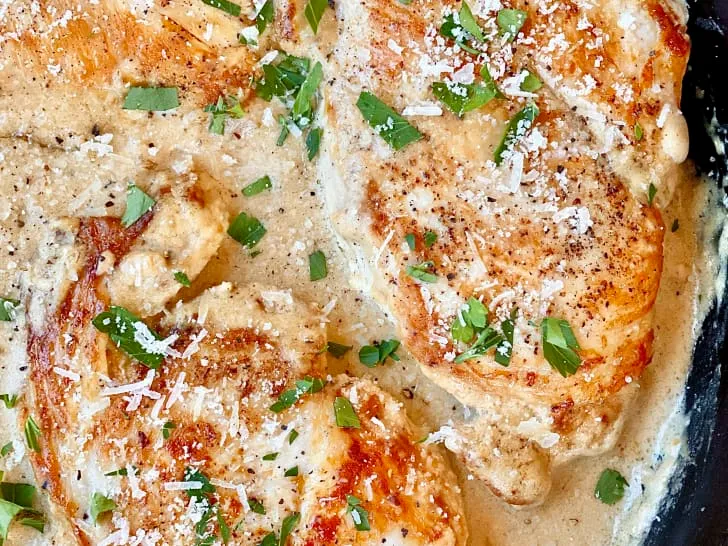
This is the top saved budget chicken recipe on Pinterest from 2024 to 2026. One skillet. Thirty minutes. A sauce so creamy that people refuse to believe it is budget friendly. The sauce uses heavy cream and Parmesan with the pan drippings from the chicken. It tastes like it simmered for hours. This one is for anyone who wants a restaurant style meal on a Tuesday night.
Ingredients
| Ingredient | Amount |
|---|---|
| Chicken breasts (boneless, skinless) | 2 medium (about 1 lb / 450 g) |
| Heavy cream | 1 cup (240 ml) |
| Chicken broth | 1/2 cup (120 ml) |
| Parmesan cheese (freshly grated) | 1/2 cup (50 g) |
| Garlic cloves (minced) | 4 |
| Butter | 2 tbsp (28 g) |
| Olive oil | 1 tbsp (15 ml) |
| Salt | 1/2 tsp (3 g) |
| Black pepper | 1/4 tsp (1 g) |
| Fresh parsley (chopped, for garnish) | 2 tbsp (8 g) |
How to Make It
- Pat the chicken breasts dry with paper towels. Season both sides with salt and pepper.
- Heat olive oil in a large skillet over medium high heat. Add the chicken. Sear until golden brown, about 4 to 5 minutes per side. The chicken should release easily from the pan when it is ready to flip.
- Transfer the chicken to a plate. It will not be fully cooked yet.
- Lower the heat to medium. Melt the butter in the same skillet. Add the garlic. Cook until it smells fragrant, about 30 seconds. Do not let it burn.
- Pour in the heavy cream and chicken broth. Whisk to scrape up the browned bits from the bottom of the pan. Those bits are pure flavor.
- Bring the sauce to a gentle simmer. Let it thicken slightly, about 3 to 4 minutes. The sauce should coat the back of a spoon without running right off.
- Stir in the Parmesan cheese until it melts into the sauce.
- Return the chicken to the skillet. Spoon some sauce over the top. Simmer for another 5 to 8 minutes until the chicken is fully cooked. The thickest part of the chicken should reach 165°F (74°C) and the juices should run clear.
- Garnish with fresh parsley. Serve immediately.
Quick tip or swap: For a dairy free version, use full fat coconut milk and nutritional yeast instead of heavy cream and Parmesan. The taste will be different but still rich. You can also add sun dried tomatoes and spinach to make this Creamy Tuscan Chicken.
Nutrition (per serving, estimate)
| Nutrition (per serving, estimate) | Amount |
|---|---|
| Calories | 485 kcal |
| Protein | 38 g |
| Carbs | 6 g |
| Fat | 33 g |
2. Poor Man’s Lobster (Monkfish with Herb Butter)
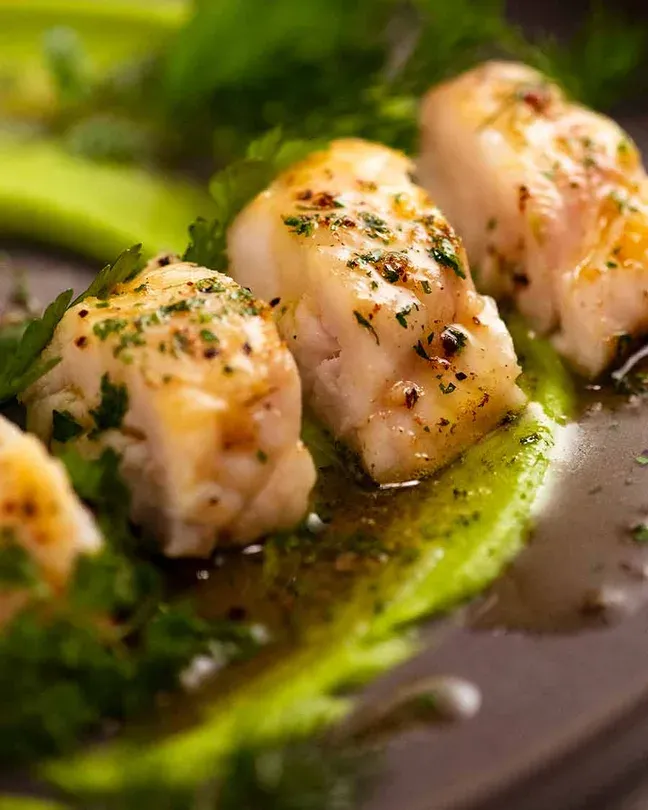
This was the number one “tastes expensive” trick on TikTok in 2025. Monkfish has the exact same texture as lobster tail. It is firm, meaty, and slightly sweet. But it costs about one quarter of the price. Ask your fishmonger for monkfish. It is often hiding under $10 per pound. The herb butter melts into the hot fish and creates that luxurious mouthfeel. This is for anyone who wants a fancy seafood dinner on a budget.
Ingredients
| Ingredient | Amount |
|---|---|
| Monkfish fillets | 1 lb (450 g) |
| Butter (unsalted) | 4 tbsp (56 g) |
| Fresh parsley (finely chopped) | 2 tbsp (8 g) |
| Fresh chives (finely chopped) | 1 tbsp (4 g) |
| Lemon (juice only) | 1/2 |
| Garlic clove (minced) | 1 |
| Salt | 1/2 tsp (3 g) |
| Black pepper | 1/4 tsp (1 g) |
| Olive oil | 1 tbsp (15 ml) |
How to Make It
- Pat the monkfish fillets completely dry with paper towels. This step is critical for a good sear. Wet fish will steam, not brown.
- Season the fish generously with salt and pepper on all sides.
- In a small bowl, mash together the softened butter, parsley, chives, lemon juice, and minced garlic. Set aside.
- Heat olive oil in a heavy skillet over medium high heat until it shimmers.
- Add the monkfish. Sear without moving it for 4 to 5 minutes. The bottom should be deep golden brown.
- Flip the fish carefully. Sear the other side for another 4 to 5 minutes. The fish should feel firm to the touch but still springy, like a cooked lobster tail.
- Transfer the monkfish to a plate. Let it rest for 2 minutes.
- Top each fillet with a generous spoonful of the herb butter. Let it melt over the warm fish before serving.
Quick tip or swap: Do not overcook monkfish or it becomes dry and tough. It is done when the flesh is opaque all the way through and springs back when pressed. You can use pollock instead of monkfish. It is even cheaper and still flaky, though the texture will be closer to cod than lobster.
Nutrition (per serving, estimate)
| Nutrition (per serving, estimate) | Amount |
|---|---|
| Calories | 410 kcal |
| Protein | 32 g |
| Carbs | 2 g |
| Fat | 30 g |
3. Canned Corned Beef Hash with Cabbage
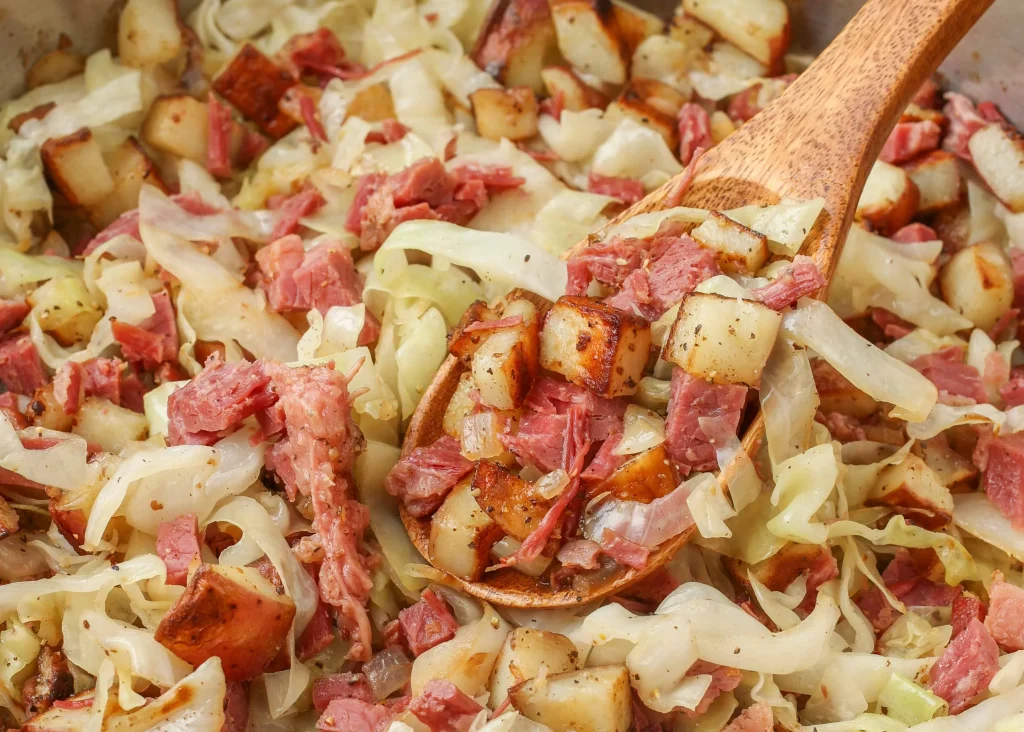
This dish is hugely popular in the UK and Australia where canned corned beef is a pantry staple. One can of corned beef costs about $3 and turns into a hearty dinner for four people. The cabbage is cheap and filling. The vinegar and Worcestershire sauce cut through the richness of the meat. This one is for nights when you want something warm, savory, and satisfying without a trip to the store.
Ingredients
| Ingredient | Amount |
|---|---|
| Canned corned beef (diced) | 1 can (12 oz / 340 g) |
| Green cabbage (shredded) | 1/2 head (about 1 lb / 450 g) |
| Onion (diced) | 1 medium |
| Carrots (diced) | 2 medium |
| Worcestershire sauce | 1 tbsp (15 ml) |
| Rice vinegar | 1 tsp (5 ml) |
| Olive oil | 2 tbsp (30 ml) |
| Black pepper | 1/4 tsp (1 g) |
How to Make It
- Open the can of corned beef. Dice it into small half inch cubes. Set aside.
- Heat olive oil in a large skillet over medium heat. Add the onion and carrots. Cook for 3 to 4 minutes until the onion turns translucent.
- Add the shredded cabbage. Cook for 5 to 7 minutes, stirring occasionally. The cabbage should soften but still have some bite. It should not turn mushy.
- Add the diced corned beef. Spread it evenly across the pan. Let it cook undisturbed for 2 to 3 minutes so the bottom gets crispy and browned.
- Stir everything together. Cook for another 2 to 3 minutes until the corned beef has crispy edges on most pieces.
- Drizzle in the Worcestershire sauce and rice vinegar. Stir to combine.
- Sprinkle with black pepper. Serve hot.
Quick tip or swap: For a more filling meal, add one diced potato to the pan with the onions and carrots. Cook until the potato is tender before adding the cabbage. You can also add a fried egg on top for breakfast for dinner.
Nutrition (per serving, estimate)
| Nutrition (per serving, estimate) | Amount |
|---|---|
| Calories | 390 kcal |
| Protein | 18 g |
| Carbs | 22 g |
| Fat | 24 g |
4. Hot Dog Fried Rice

This is the most controversial and most saved budget dinner on Reddit’s r/EatCheapAndHealthy in 2025. It sounds absurd. Three hot dogs. Leftover rice. It tastes genuinely good. The hot dogs brown in the pan and release salty, smoky fat that flavors the entire dish. This one is for skeptics and for anyone who needs to feed picky kids. Try it before you judge it.
Ingredients
| Ingredient | Amount |
|---|---|
| Day old white rice (cold) | 3 cups (540 g) |
| Hot dogs (sliced into rounds) | 3 |
| Eggs | 2 |
| Frozen peas and carrots | 1 cup (140 g) |
| Soy sauce (or tamari for GF) | 3 tbsp (45 ml) |
| Garlic clove (minced) | 2 |
| Green onions (sliced) | 2 |
| Sesame oil (optional) | 1 tsp (5 ml) |
| Olive oil | 2 tbsp (30 ml) |
How to Make It
- Use day old rice only. Fresh rice has too much moisture and will turn into glue in the pan. Break up any clumps with your fingers before cooking.
- Heat 1 tablespoon of olive oil in a large skillet or wok over high heat. Get the pan very hot.
- Add the sliced hot dogs. Cook until the edges brown and curl, about 2 to 3 minutes. Remove them from the pan and set aside.
- Add a little more oil to the pan if needed. Crack the eggs directly into the hot pan. Scramble them quickly, breaking them into small pieces. Remove the eggs and set aside with the hot dogs.
- Add the remaining oil to the pan. Add the garlic. Cook for 15 seconds until fragrant.
- Add the day old rice. Spread it in an even layer. Let it cook undisturbed for 1 to 2 minutes. This creates crispy spots on the rice.
- Stir the rice. Add the frozen peas and carrots. Toss everything together for 1 minute.
- Return the hot dogs and scrambled eggs to the pan. Drizzle in the soy sauce and sesame oil if using. Toss to combine.
- Cook for another 1 to 2 minutes until everything is hot and the rice has more crispy spots. The rice should smell toasty and smoky.
- Stir in the green onions. Serve immediately.
Quick tip or swap: Do not skip the high heat. Medium heat makes steamed rice, not fried rice. The pan should be so hot that the soy sauce sizzles and evaporates almost instantly. For a spicy version, add 1 tablespoon of kimchi or a drizzle of gochujang.
Nutrition (per serving, estimate)
| Nutrition (per serving, estimate) | Amount |
|---|---|
| Calories | 490 kcal |
| Protein | 16 g |
| Carbs | 48 g |
| Fat | 25 g |
5. Budget Steak with Garlic Butter and Baked Potato
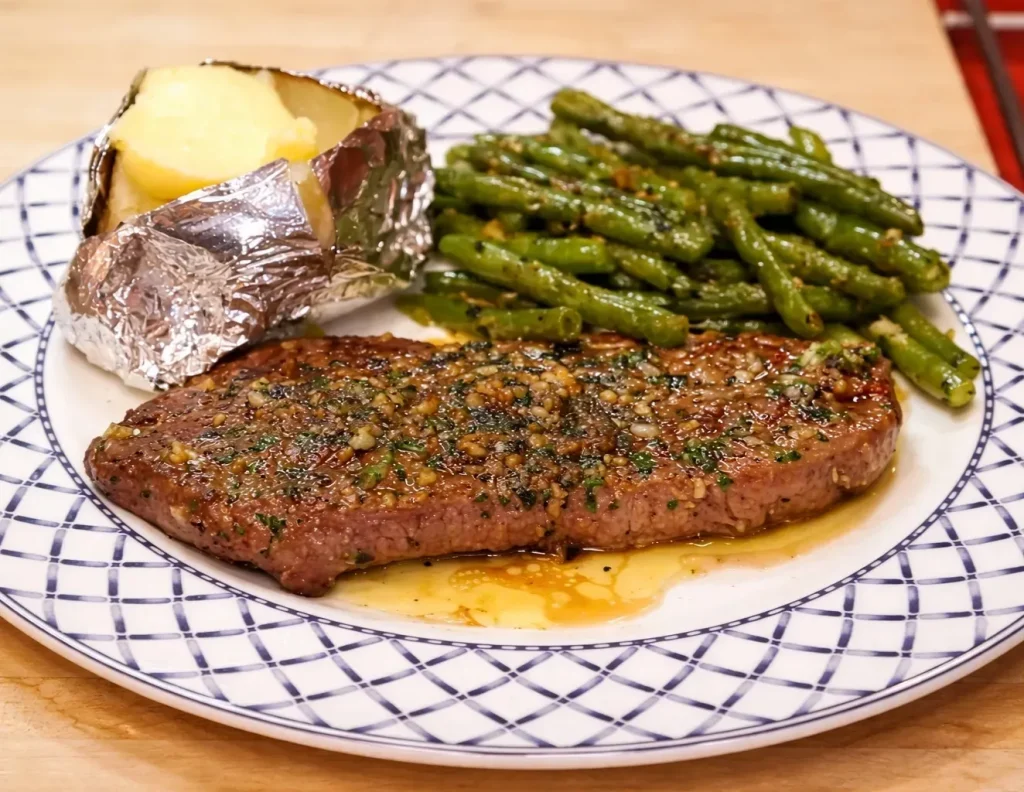
Searches for “cheap steak cuts” are up 150% since 2023. You do not need ribeye. You need technique. Budget cuts like top sirloin, chuck eye, or flat iron cost under $10 per pound. They become tender and juicy when you cook them hard and fast and then let them rest. The garlic butter does the heavy lifting. This one is for steak lovers who thought they could not afford steak night anymore.
Ingredients
| Ingredient | Amount |
|---|---|
| Budget steak (top sirloin or chuck eye) | 1 lb (450 g) |
| Russet potato | 2 large |
| Butter (unsalted) | 3 tbsp (42 g) |
| Garlic clove (minced) | 2 |
| Fresh parsley (chopped) | 1 tbsp (4 g) |
| Olive oil | 1 tbsp (15 ml) |
| Salt | 1 tsp (6 g) |
| Black pepper | 1/2 tsp (2 g) |
How to Make It
- Preheat your oven to 400°F (200°C). Scrub the potatoes and prick them several times with a fork. Bake directly on the oven rack for 45 to 60 minutes until the skins are crisp and the insides are soft.
- About 20 minutes before the potatoes are done, start the steak. Pat the steak completely dry with paper towels. Wet steak will steam, not sear.
- Season the steak generously on all sides with salt and pepper. Use more than you think you need.
- Heat olive oil in a heavy cast iron skillet over high heat until the oil just starts to smoke.
- Lay the steak in the pan away from your body to avoid splatter. Do not move it. Sear for 3 to 4 minutes until a dark brown crust forms.
- Flip the steak. Sear the other side for another 3 to 4 minutes for medium rare. The steak should feel firm but still give a little when pressed.
- Lower the heat to medium. Add the butter and garlic to the pan. Tilt the pan so the butter pools. Spoon the garlic butter over the steak constantly for 1 minute.
- Transfer the steak to a cutting board. Do not skip the rest. Let it rest for 5 to 10 minutes. The juices need time to redistribute.
- Slice the steak against the grain. Top with the remaining garlic butter from the pan. Serve with the baked potatoes.
Quick tip or swap: An instant read thermometer is your best friend here. Pull the steak at 125°F (52°C) for medium rare. It will rise to 130°F (54°C) while resting. For a low carb meal, swap the baked potato for roasted broccoli or cauliflower mash.
Nutrition (per serving, estimate)
| Nutrition (per serving, estimate) | Amount |
|---|---|
| Calories | 590 kcal |
| Protein | 42 g |
| Carbs | 38 g |
| Fat | 30 g |
6. Crispy Salmon Patties
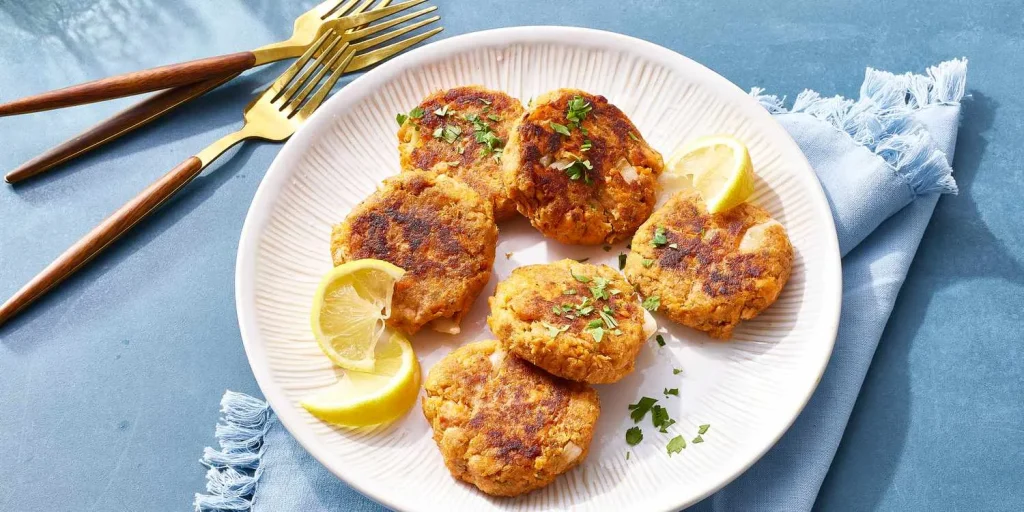
Canned salmon is wildly underrated and cheap. A 14 ounce can costs about $4 and feeds a family of four. These patties go viral every few months because the outside gets shatteringly crisp and the inside stays tender and moist. The panko breadcrumbs make the difference. This one is for anyone who wants a high protein dinner without spending on fresh fish.
Ingredients
| Ingredient | Amount |
|---|---|
| Canned pink salmon (drained) | 1 can (14.75 oz / 418 g) |
| Panko breadcrumbs | 1 cup (50 g) |
| Egg (lightly beaten) | 1 large |
| Fresh dill (chopped) | 2 tbsp (8 g) |
| Green onion (finely sliced) | 2 |
| Lemon juice | 1 tbsp (15 ml) |
| Dijon mustard | 1 tsp (5 ml) |
| Olive oil (for frying) | 3 tbsp (45 ml) |
How to Make It
- Drain the canned salmon very well. Use a fork to flake it into a large bowl. Remove any large bones or skin if you prefer, but the bones are soft and full of calcium.
- Add the panko breadcrumbs, beaten egg, fresh dill, green onion, lemon juice, and Dijon mustard. Mix gently until everything comes together. Do not overmix or the patties will be dense.
- Divide the mixture into 8 equal portions. Shape each portion into a patty about 2 inches wide and 1/2 inch thick.
- Heat olive oil in a large skillet over medium heat. The oil should shimmer but not smoke.
- Place the patties in the skillet. Do not crowd the pan. Cook in batches if needed.
- Cook for 3 to 4 minutes per side until deep golden brown. The patties should hold together when you flip them. They should feel firm to the touch and have crispy edges.
- Transfer to a paper towel lined plate to drain excess oil. Serve warm.
Quick tip or swap: For gluten free patties, use gluten free panko or crushed pork rinds. For a Chesapeake Bay twist, add 1 teaspoon of Old Bay seasoning to the mixture. These patties are also delicious cold the next day.
Nutrition (per serving, estimate)
| Nutrition (per serving, estimate) | Amount |
|---|---|
| Calories | 320 kcal |
| Protein | 24 g |
| Carbs | 12 g |
| Fat | 19 g |
7. Creamy Shrimp Thermidor
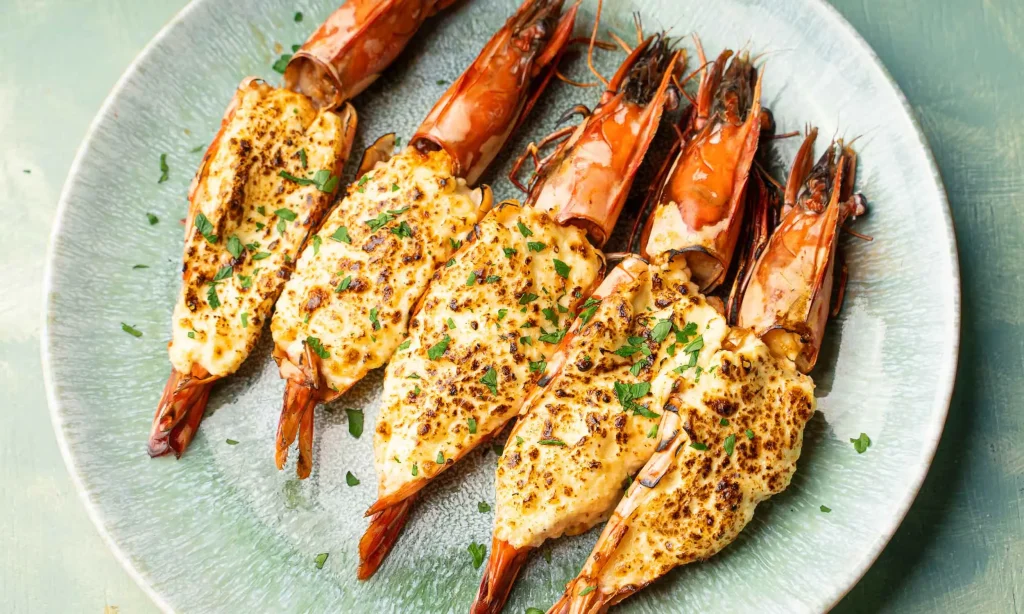
This recipe uses shrimp instead of lobster to create a rich, creamy, broiled top that looks like a $35 restaurant plate. Frozen shrimp are affordable and work perfectly here. The Dijon mustard cuts through the richness and adds unexpected depth. This one is for date night at home or any night you want to feel fancy on a Tuesday budget.
Ingredients
| Ingredient | Amount |
|---|---|
| Shrimp (peeled, deveined, thawed) | 1 lb (450 g) |
| Heavy cream | 3/4 cup (180 ml) |
| Parmesan cheese (grated) | 1/2 cup (50 g) |
| Shallot (finely minced) | 1 medium |
| Dijon mustard | 1 tbsp (15 ml) |
| Butter | 2 tbsp (28 g) |
| Dry white wine or chicken broth | 1/4 cup (60 ml) |
| Salt | 1/4 tsp (1 g) |
| Black pepper | 1/8 tsp (0.5 g) |
| Fresh parsley (chopped) | 1 tbsp (4 g) |
How to Make It
- Preheat your broiler to high. Position an oven rack about 6 inches from the heat source.
- Pat the shrimp completely dry with paper towels. Season with a pinch of salt and pepper.
- Melt 1 tablespoon of butter in an oven safe skillet over medium high heat. Add the shrimp. Cook for 1 to 2 minutes per side until they turn pink and curl slightly. Do not overcook. Remove the shrimp and set aside.
- Melt the remaining butter in the same skillet. Add the shallot. Cook for 1 to 2 minutes until soft and translucent.
- Pour in the white wine or broth. Scrape up the browned bits from the bottom of the pan. Let it bubble for 1 minute until reduced by half.
- Lower the heat to medium. Add the heavy cream and Dijon mustard. Stir until combined.
- Simmer the sauce for 3 to 4 minutes until it thickens slightly. It should coat the back of a spoon.
- Stir in half of the Parmesan cheese until it melts. Return the shrimp to the skillet. Stir to coat in the sauce.
- Sprinkle the remaining Parmesan cheese over the top. Transfer the skillet to the oven under the broiler.
- Broil for 1 to 2 minutes until the top is golden brown and bubbling at the edges. Watch closely. It burns fast.
- Garnish with fresh parsley. Serve immediately.
Quick tip or swap: Do not walk away while broiling. The difference between golden and burnt is about 30 seconds. You can use scallops instead of shrimp for an even more elegant version. They cook in the same amount of time.
Nutrition (per serving, estimate)
| Nutrition (per serving, estimate) | Amount |
|---|---|
| Calories | 480 kcal |
| Protein | 32 g |
| Carbs | 6 g |
| Fat | 35 g |
8. Honey Mustard Baked Chicken
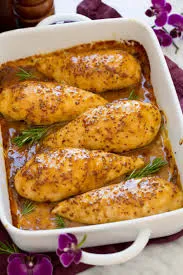
This was the most pinned chicken recipe on Budget Bytes in 2024. The glaze caramelizes in the oven and creates a sticky, lacquered finish that looks like it took hours. It takes 25 minutes. The combination of honey and Dijon mustard balances sweet, tangy, and savory. This one is for busy weeknights when you want something that feels special but takes almost no effort.
Ingredients
| Ingredient | Amount |
|---|---|
| Chicken breasts (boneless, skinless) | 2 medium (about 1 lb / 450 g) |
| Dijon mustard | 1/4 cup (60 g) |
| Honey | 3 tbsp (63 g) |
| Olive oil | 2 tbsp (30 ml) |
| Apple cider vinegar | 1 tbsp (15 ml) |
| Garlic powder | 1 tsp (3 g) |
| Paprika | 1/2 tsp (1 g) |
| Salt | 1/2 tsp (3 g) |
| Black pepper | 1/4 tsp (1 g) |
How to Make It
- Preheat your oven to 375°F (190°C). Line a baking sheet with parchment paper or foil for easy cleanup.
- In a small bowl, whisk together the Dijon mustard, honey, olive oil, apple cider vinegar, garlic powder, paprika, salt, and pepper until smooth.
- Pat the chicken breasts dry. Place them on the prepared baking sheet.
- Brush half of the glaze generously over the tops and sides of the chicken breasts.
- Bake for 15 minutes. The glaze will start to bubble and darken.
- Remove the baking sheet from the oven. Brush the remaining glaze over the chicken.
- Increase the oven temperature to 400°F (200°C). Return the baking sheet to the oven.
- Bake for another 8 to 10 minutes. The chicken should reach 165°F (74°C) internally. The glaze should be dark amber and sticky. The edges of the chicken should look caramelized.
- Let the chicken rest for 5 minutes before serving. The glaze will set as it cools.
- Spoon any glaze left on the baking sheet over the chicken.
Quick tip or swap: For a spicy version, add a pinch of cayenne pepper to the glaze. The heat balances the sweetness nicely. Leftovers are excellent sliced over a salad or tucked into a sandwich.
Nutrition (per serving, estimate)
| Nutrition (per serving, estimate) | Amount |
|---|---|
| Calories | 420 kcal |
| Protein | 34 g |
| Carbs | 22 g |
| Fat | 21 g |
9. Garlic Butter Langostino Rolls
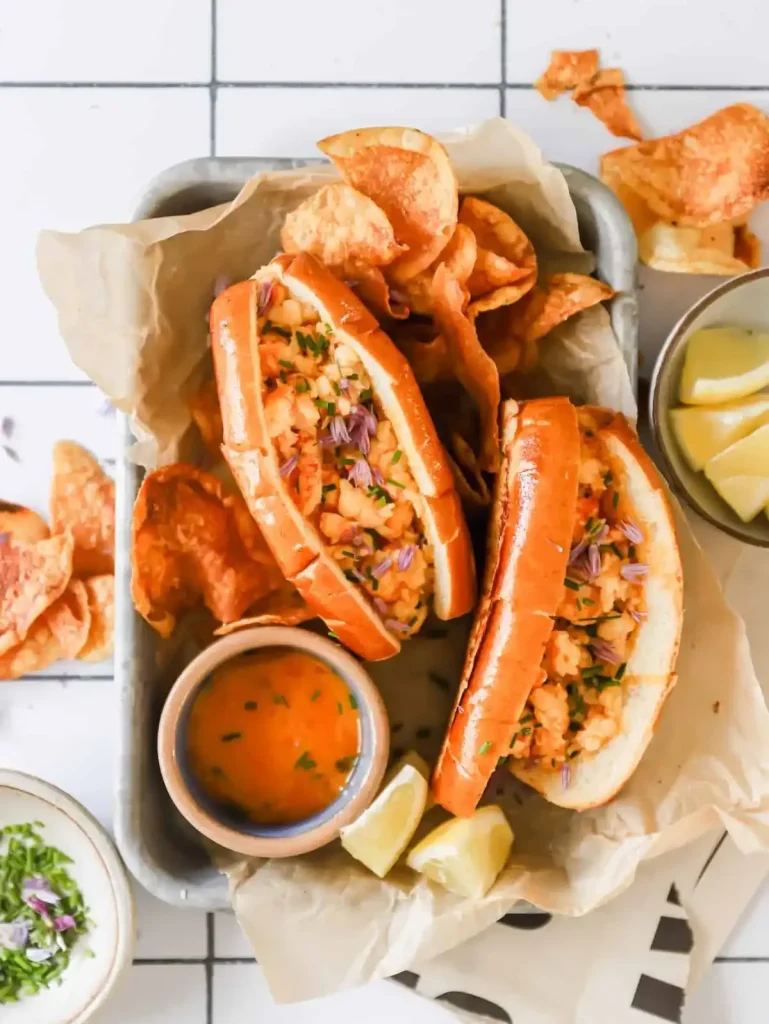
Langostino is sometimes called “poor man’s lobster.” Frozen bags cost $5 to $8 and taste remarkably similar to lobster. These rolls went viral on Instagram Reels in 2025. They are simple, elegant, and cheap. The butter and garlic do almost all the work. This one is for lobster roll cravings when lobster is not in the budget.
Ingredients
| Ingredient | Amount |
|---|---|
| Frozen langostino tails (thawed) | 8 oz (225 g) |
| Soft split top rolls (like lobster rolls) | 4 |
| Butter (unsalted) | 4 tbsp (56 g) |
| Garlic cloves (minced) | 3 |
| Lemon juice | 1 tbsp (15 ml) |
| Fresh parsley (chopped) | 2 tbsp (8 g) |
| Salt | 1/4 tsp (1 g) |
How to Make It
- Thaw the langostino tails completely according to the package directions. Pat them dry with paper towels.
- Melt the butter in a skillet over medium heat. Add the minced garlic. Cook for 30 seconds until it smells fragrant. Do not let the garlic brown.
- Add the langostino tails to the skillet. Toss to coat in the garlic butter. Cook for 2 to 3 minutes until just heated through. The meat should be opaque and warm in the center. Overcooking makes them rubbery.
- Stir in the lemon juice and fresh parsley. Remove from heat.
- While the langostino cooks, toast the split top rolls. You can do this in a dry skillet or under the broiler. The edges should be golden brown and crisp.
- Spoon the garlic butter langostino evenly into each toasted roll. Drizzle any remaining butter from the pan over the top.
- Serve immediately while the rolls are still warm and crisp.
Quick tip or swap: Add a pinch of smoked paprika to the butter for extra depth. You can also add a spoonful of mayonnaise to the rolls before adding the langostino for a creamier texture. This recipe also works with canned crab meat or chopped cooked shrimp.
Nutrition (per serving, estimate)
| Nutrition (per serving, estimate) | Amount |
|---|---|
| Calories | 480 kcal |
| Protein | 18 g |
| Carbs | 34 g |
| Fat | 30 g |
10. Oven Baked Cajun Chicken and Potatoes
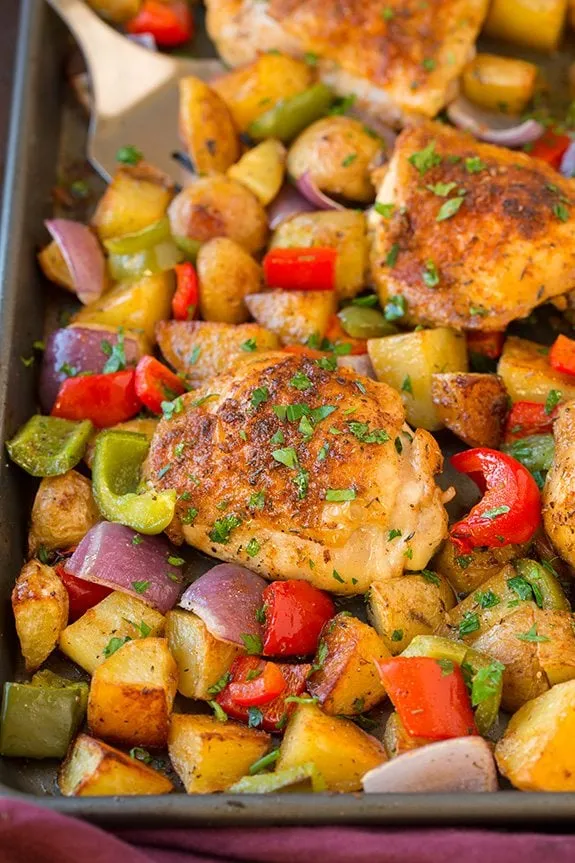
This recipe from YouTuber ItsJustKaylaBee got over 2 million views in 2024. It is a full dinner on one sheet pan. Protein, starch, and vegetable. It feeds four people for under $12. The chicken broth keeps everything moist while it roasts. The Cajun seasoning brings heat and smoky flavor. This one is for nights when you want a complete meal with almost no cleanup.
Ingredients
| Ingredient | Amount |
|---|---|
| Chicken drumsticks or thighs | 6 pieces (about 2 lb / 900 g) |
| Baby potatoes (halved) | 1 lb (450 g) |
| Green beans (trimmed) | 8 oz (225 g) |
| Cajun seasoning | 2 tbsp (15 g) |
| Butter (cut into small cubes) | 3 tbsp (42 g) |
| Chicken broth | 1/4 cup (60 ml) |
| Olive oil | 2 tbsp (30 ml) |
| Salt | 1 tsp (6 g) |
How to Make It
- Preheat your oven to 400°F (200°C). Line a large sheet pan with parchment paper or foil.
- Pat the chicken pieces dry with paper towels. Place them on one side of the sheet pan.
- Toss the halved potatoes and green beans with olive oil and a pinch of salt. Spread them on the other side of the sheet pan.
- Sprinkle the Cajun seasoning evenly over everything. Use your hands to rub it onto the chicken and potatoes.
- Dot the butter cubes all over the chicken and vegetables. Pour the chicken broth onto the sheet pan, not directly over the chicken so the skin stays dry.
- Roast for 25 to 30 minutes. Halfway through, stir the vegetables and flip the chicken pieces.
- The chicken is done when the skin is golden and crispy and the juices run clear. The potatoes should be fork tender. The green beans should be slightly charred at the edges.
- Let the pan rest for 5 minutes before serving. Spoon the pan juices over the chicken.
Quick tip or swap: You can swap the green beans for broccoli, Brussels sprouts, or asparagus. If you do not have Cajun seasoning, mix together paprika, garlic powder, onion powder, oregano, cayenne, and black pepper. For less heat, use half the Cajun seasoning.
Nutrition (per serving, estimate)
| Nutrition (per serving, estimate) | Amount |
|---|---|
| Calories | 540 kcal |
| Protein | 38 g |
| Carbs | 32 g |
| Fat | 28 g |
11. Creamy Tomato and White Bean Soup
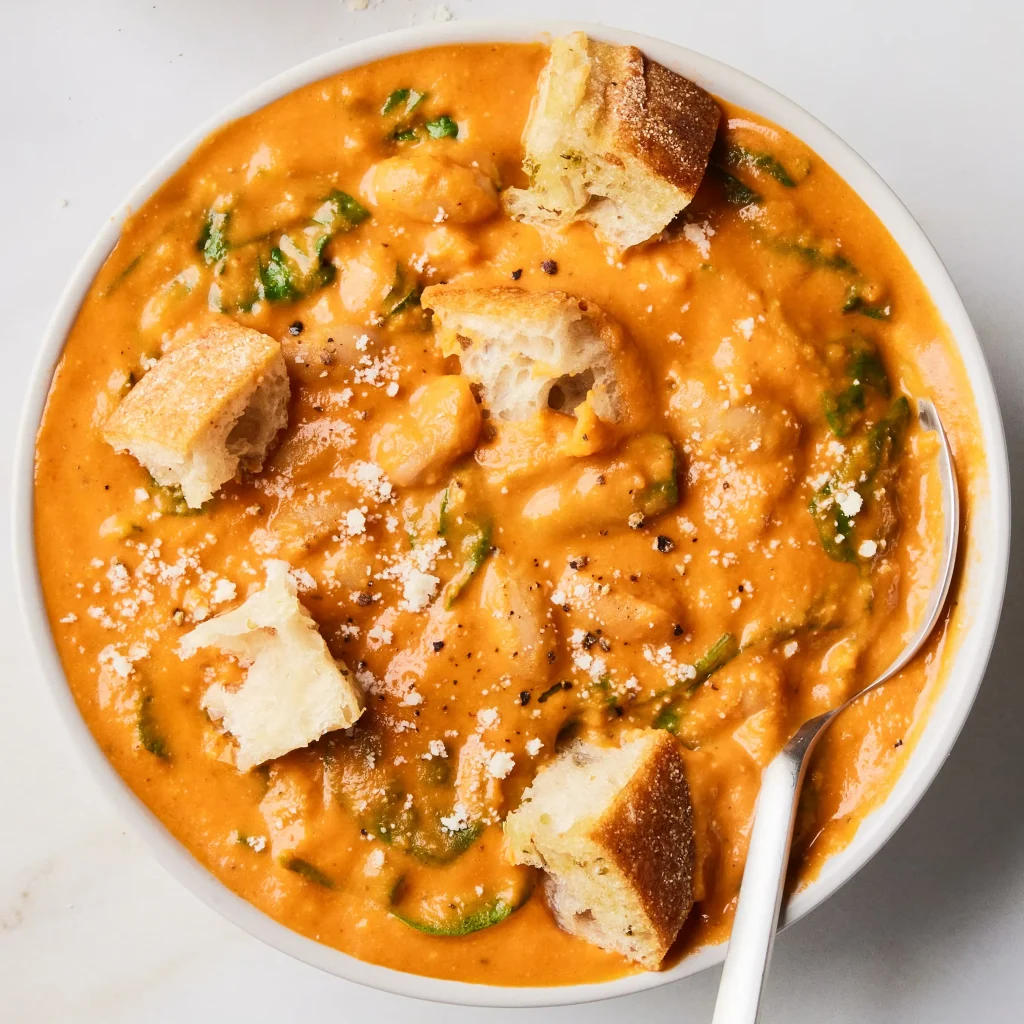
This soup is vegan, pantry friendly, and costs almost nothing to make. A can of tomatoes, a can of beans, and some pantry spices turn into something deeply creamy without any cream. The secret is blending part of the soup. The white beans break down and create a silky texture. This one is for cold nights when you want something that feels like a hug in a bowl.
Ingredients
| Ingredient | Amount |
|---|---|
| Canned crushed tomatoes | 28 oz (794 g) |
| Canned white beans (cannellini or great northern) | 2 cans (15 oz / 425 g each) |
| Onion (diced) | 1 medium |
| Carrot (diced) | 1 large |
| Celery stalk (diced) | 1 |
| Garlic cloves (minced) | 4 |
| Vegetable broth | 3 cups (720 ml) |
| Olive oil | 2 tbsp (30 ml) |
| Dried oregano | 1 tsp (2 g) |
| Red pepper flakes (optional) | 1/4 tsp (0.5 g) |
| Salt | 1 tsp (6 g) |
| Black pepper | 1/2 tsp (2 g) |
How to Make It
- Heat olive oil in a large pot over medium heat. Add the onion, carrot, and celery. Cook for 8 to 10 minutes until soft. The vegetables should smell sweet and caramelized.
- Add the garlic, oregano, and red pepper flakes if using. Cook for 1 minute until fragrant.
- Pour in the crushed tomatoes and vegetable broth. Add one can of white beans, including the liquid from the can. Stir everything together.
- Bring the soup to a simmer. Cook for 15 minutes to let the flavors blend.
- While the soup simmers, drain and rinse the second can of white beans.
- Use an immersion blender to blend the soup until mostly smooth. A few chunky bits are good. If you do not have an immersion blender, transfer half the soup to a regular blender, blend until smooth, and return it to the pot. Be careful with hot liquids.
- Stir in the second can of drained white beans. Simmer for another 5 minutes to heat them through.
- Taste and adjust salt and pepper. The soup should be thick, creamy, and bright with tomato flavor.
- Serve hot with crusty bread.
Quick tip or swap: For a smoky version, add 1 teaspoon of smoked paprika with the garlic. This soup freezes beautifully for up to 3 months. To make it gluten free, skip the bread or use gluten free bread.
Nutrition (per serving, estimate)
| Nutrition (per serving, estimate) | Amount |
|---|---|
| Calories | 290 kcal |
| Protein | 12 g |
| Carbs | 48 g |
| Fat | 7 g |
12. Teriyaki Glazed Chicken
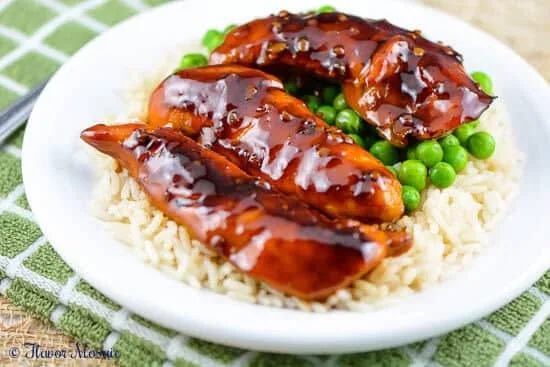
This is better than takeout and costs under $10 for four servings. The homemade teriyaki sauce is sticky, salty, sweet, and glossy. It takes 5 minutes to make. No mysterious ingredients. No corn syrup. This one is for takeout cravings on a budget night.
Ingredients
| Ingredient | Amount |
|---|---|
| Chicken thighs (boneless, skinless) | 1.5 lb (680 g) |
| Soy sauce (or tamari for GF) | 1/2 cup (120 ml) |
| Water | 1/2 cup (120 ml) |
| Brown sugar | 1/4 cup (55 g) |
| Honey | 2 tbsp (42 g) |
| Rice vinegar | 2 tbsp (30 ml) |
| Garlic cloves (minced) | 3 |
| Fresh ginger (grated) | 1 tbsp (15 g) |
| Cornstarch | 1 tbsp (8 g) |
| Water (for slurry) | 2 tbsp (30 ml) |
| Green onions (sliced) | 2 |
| Sesame seeds | 1 tbsp (9 g) |
| Olive oil | 1 tbsp (15 ml) |
How to Make It
- In a small saucepan, combine the soy sauce, 1/2 cup water, brown sugar, honey, rice vinegar, garlic, and ginger. Bring to a simmer over medium heat, stirring to dissolve the sugar.
- In a small bowl, whisk together the cornstarch and 2 tablespoons of water to make a slurry.
- Pour the slurry into the simmering sauce. Stir constantly for 1 to 2 minutes until the sauce thickens enough to coat the back of a spoon. Remove from heat.
- Cut the chicken thighs into 1 inch pieces. Season with a pinch of salt.
- Heat olive oil in a large skillet or wok over high heat. Add the chicken in a single layer. Do not crowd the pan. Cook in batches if needed.
- Sear the chicken without moving it for 3 to 4 minutes until the bottom is browned. Flip and cook for another 2 to 3 minutes until the chicken is cooked through. The chicken should be golden brown on the outside and no longer pink inside.
- Pour the teriyaki sauce over the chicken. Stir to coat. Let it bubble for 1 minute until the sauce glazes the chicken.
- Sprinkle with green onions and sesame seeds. Serve immediately over rice.
Quick tip or swap: For a thicker glaze, let the sauce simmer longer before adding the chicken. For a spicy version, add 1 teaspoon of sriracha to the sauce. This recipe also works with thinly sliced beef or tofu.
Nutrition (per serving, estimate)
| Nutrition (per serving, estimate) | Amount |
|---|---|
| Calories | 450 kcal |
| Protein | 32 g |
| Carbs | 34 g |
| Fat | 20 g |
13. Imitation Lobster Mac and Cheese
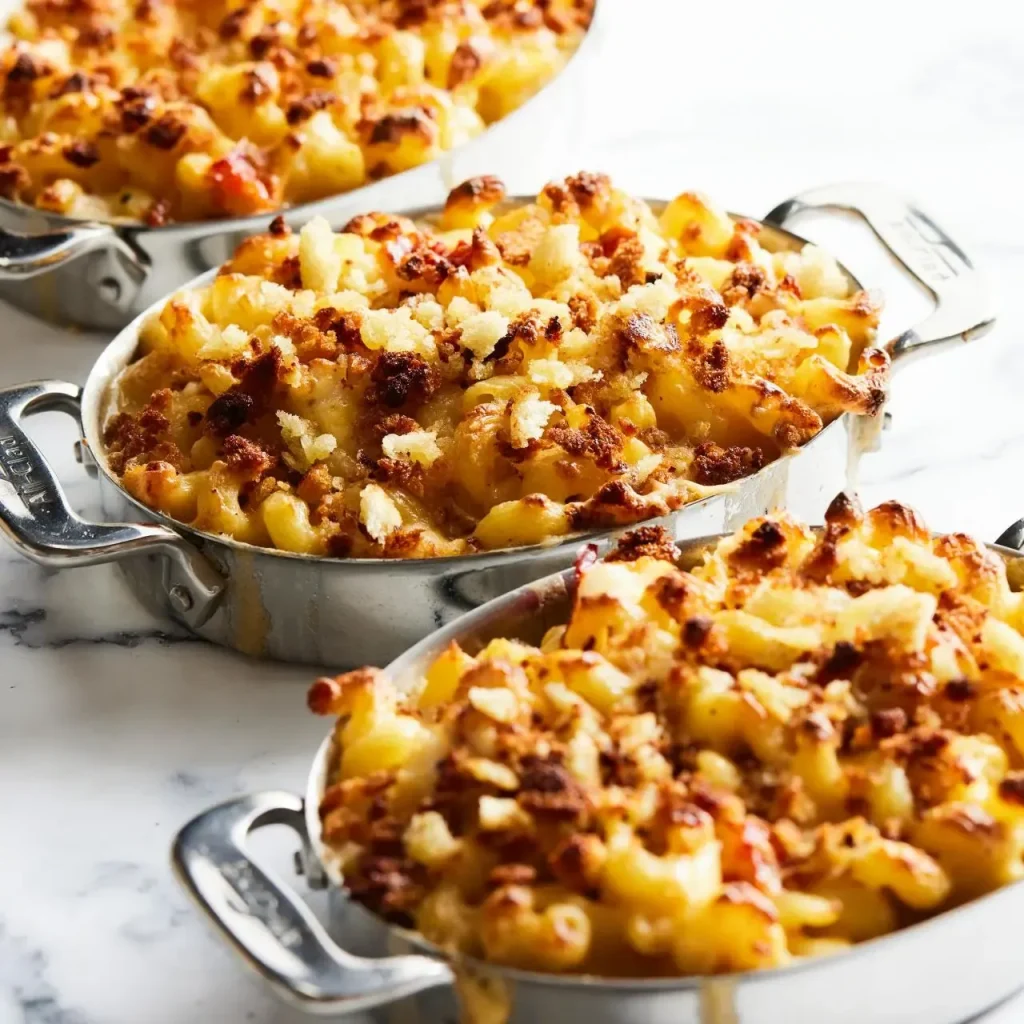
This one is for the kids. And for the adults who secretly love it too. Imitation lobster (surimi) is made from white fish and costs a fraction of real lobster. It flakes into a mac and cheese and tastes surprisingly similar. The creamy, cheesy, slightly sweet pasta is pure comfort food. This one is for nights when everyone needs a win.
Ingredients
| Ingredient | Amount |
|---|---|
| Elbow macaroni | 1 lb (450 g) |
| Imitation lobster (surimi, shredded) | 8 oz (225 g) |
| Sharp cheddar cheese (grated) | 2 cups (200 g) |
| Gruyere or Monterey Jack (grated) | 1 cup (100 g) |
| Milk | 2 cups (480 ml) |
| Butter | 4 tbsp (56 g) |
| Flour | 1/4 cup (30 g) |
| Garlic powder | 1 tsp (3 g) |
| Paprika | 1/2 tsp (1 g) |
| Salt | 1 tsp (6 g) |
| Black pepper | 1/2 tsp (2 g) |
How to Make It
- Bring a large pot of salted water to a boil. Cook the macaroni according to the package directions until al dente. Drain and set aside.
- While the pasta cooks, shred the imitation lobster into bite sized pieces using your hands or a fork. Set aside.
- In a large pot or Dutch oven, melt the butter over medium heat. Add the flour, garlic powder, paprika, salt, and pepper. Whisk constantly for 1 to 2 minutes until the mixture turns light golden brown.
- Slowly pour in the milk while whisking constantly. Keep whisking until the sauce thickens enough to coat the back of a spoon, about 3 to 4 minutes.
- Lower the heat to low. Add the grated cheeses one handful at a time. Stir until each handful melts before adding the next.
- Once all the cheese is melted and smooth, add the shredded imitation lobster. Stir gently to combine.
- Add the cooked macaroni to the cheese sauce. Stir until every piece of pasta is coated.
- Taste and adjust salt and pepper. The mac and cheese should be creamy, cheesy, and slightly sweet from the surimi.
- Serve hot. The sauce will thicken as it cools.
Quick tip or swap: For a crispy topping, transfer the mac and cheese to a baking dish, sprinkle with more cheese and panko breadcrumbs, and broil for 2 to 3 minutes until golden brown. You can also use real crab meat if you have it, but the imitation version works great here.
Nutrition (per serving, estimate)
| Nutrition (per serving, estimate) | Amount |
|---|---|
| Calories | 650 kcal |
| Protein | 28 g |
| Carbs | 58 g |
| Fat | 34 g |
14. Budget Shepherd’s Pie
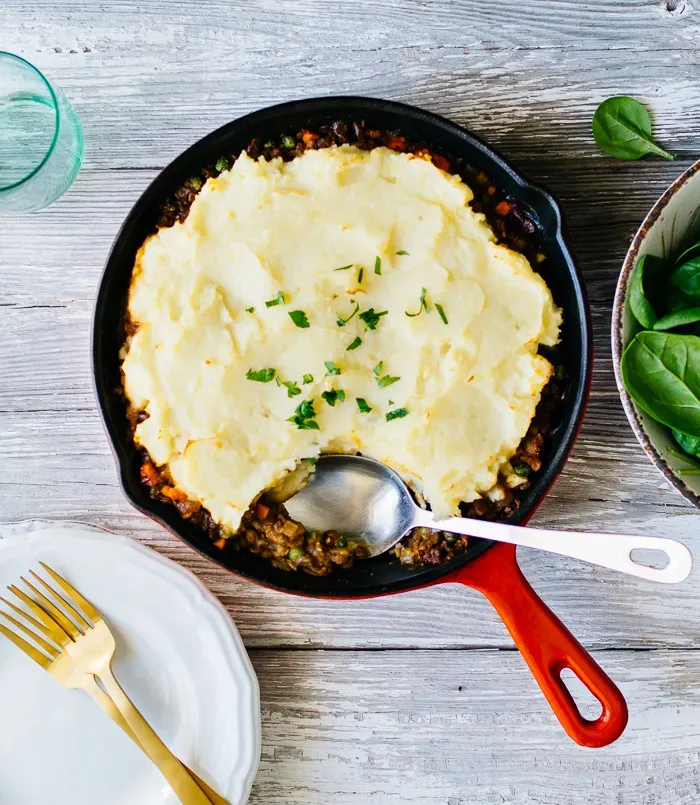
Traditional shepherd’s pie uses all lamb. That gets expensive fast. This version stretches the meat with brown lentils. You get the same hearty, savory filling with half the meat. The mashed potato topping gets golden and crisp in the oven. This one is for cold weather and hungry families.
Ingredients
| Ingredient | Amount |
|---|---|
| Ground beef or lamb | 1/2 lb (225 g) |
| Brown lentils (cooked or canned) | 1 can (15 oz / 425 g) |
| Onion (diced) | 1 medium |
| Carrots (diced) | 2 medium |
| Frozen peas | 1 cup (140 g) |
| Beef or vegetable broth | 1 cup (240 ml) |
| Tomato paste | 2 tbsp (32 g) |
| Worcestershire sauce | 1 tbsp (15 ml) |
| Potatoes (peeled, cubed) | 2 lb (900 g) |
| Butter | 4 tbsp (56 g) |
| Milk | 1/2 cup (120 ml) |
| Salt | 1 tsp (6 g) |
| Black pepper | 1/2 tsp (2 g) |
How to Make It
- Preheat your oven to 375°F (190°C).
- Place the cubed potatoes in a large pot. Cover with cold water. Add a generous pinch of salt. Bring to a boil and cook for 15 to 20 minutes until the potatoes are fork tender.
- While the potatoes cook, heat a large skillet over medium high heat. Add the ground meat. Cook until browned, breaking it up with a spoon, about 5 to 7 minutes. Drain excess fat if needed.
- Add the onion and carrots to the skillet. Cook for 5 minutes until softened.
- Stir in the tomato paste and Worcestershire sauce. Cook for 1 minute until the tomato paste darkens slightly.
- Add the broth, lentils, and frozen peas. Stir to combine. Simmer for 5 to 7 minutes until the liquid reduces and the filling is thick.
- Drain the cooked potatoes. Return them to the pot over low heat for 1 minute to dry out any remaining moisture.
- Add the butter and milk to the potatoes. Mash until smooth and creamy. Season with salt and pepper.
- Pour the meat and lentil filling into a 9×13 inch baking dish. Spread it into an even layer.
- Spoon the mashed potatoes over the filling. Spread gently to cover the filling completely. Use a fork to create ridges on top. Those ridges will get crispy.
- Place the dish on a baking sheet to catch any drips. Bake for 20 to 25 minutes until the filling is bubbling at the edges and the potato topping is golden brown.
- Let the pie rest for 10 minutes before serving. The filling needs time to set.
Quick tip or swap: For a dairy free topping, use olive oil and plant milk instead of butter and milk. The potatoes will still be creamy. You can also top with sweet potatoes for a different flavor.
Nutrition (per serving, estimate)
| Nutrition (per serving, estimate) | Amount |
|---|---|
| Calories | 520 kcal |
| Protein | 24 g |
| Carbs | 58 g |
| Fat | 22 g |
15. Lemon Pepper Grilled Chicken
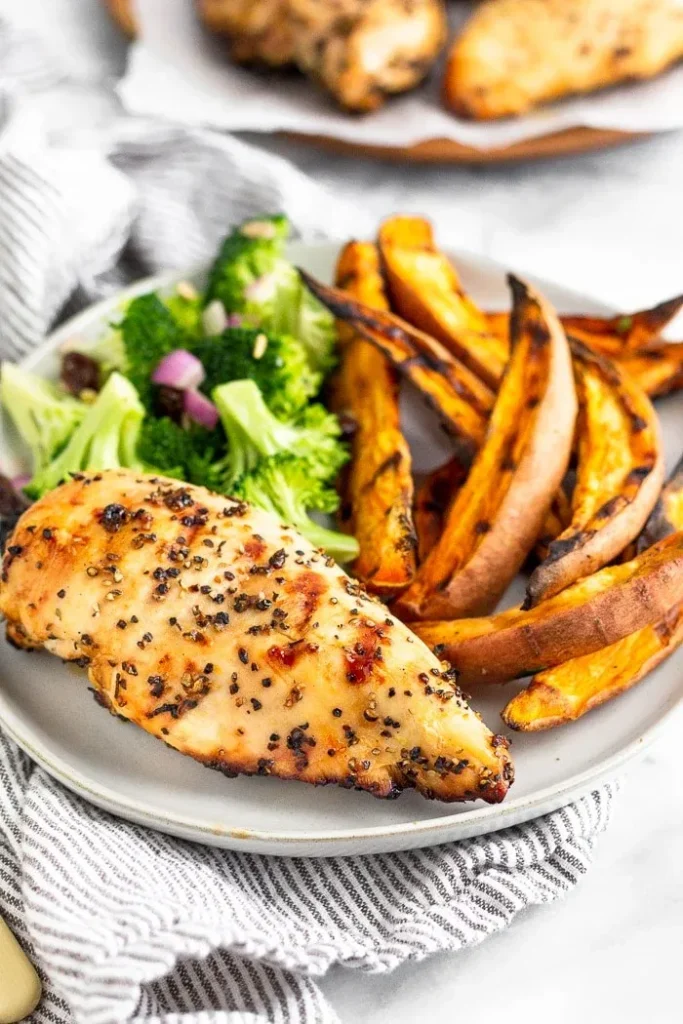
This is the summer budget hero. A simple marinade of lemon, black pepper, garlic, and olive oil transforms cheap chicken breasts into something bright and flavorful. Grill it or cook it in a cast iron skillet. This one is for backyard barbecues and quick weeknight grilling when you want something light.
Ingredients
| Ingredient | Amount |
|---|---|
| Chicken breasts (boneless, skinless) | 4 (about 2 lb / 900 g) |
| Lemon (juice and zest) | 2 |
| Olive oil | 1/4 cup (60 ml) |
| Garlic cloves (minced) | 4 |
| Coarse black pepper | 1 tbsp (6 g) |
| Salt | 1 tsp (6 g) |
| Dried oregano | 1 tsp (2 g) |
How to Make It
- Pat the chicken breasts dry. If they are very thick, pound them to an even thickness of about 1 inch so they cook evenly.
- In a small bowl, whisk together the lemon juice, lemon zest, olive oil, minced garlic, black pepper, salt, and oregano.
- Place the chicken in a large bowl or a zip top bag. Pour the marinade over the chicken. Turn to coat.
- Marinate for at least 30 minutes at room temperature or up to 4 hours in the refrigerator. Do not marinate longer than 4 hours or the lemon will start to cook the chicken and make it mushy.
- Preheat a grill or a cast iron skillet over medium high heat.
- Remove the chicken from the marinade. Let excess drip off. Pat the chicken dry with paper towels. Dry chicken gets a better sear.
- Grill or pan sear the chicken for 5 to 7 minutes per side. The chicken should have dark grill marks and feel firm to the touch. The internal temperature should reach 165°F (74°C).
- Let the chicken rest for 5 minutes before slicing. The juices need time to redistribute.
- Serve with an extra squeeze of lemon if desired.
Quick tip or swap: The coarse black pepper is important here. Fine ground pepper will be too sharp. For a faster version, use lemon pepper seasoning from the spice aisle instead of making your own blend. This chicken is excellent cold on salads the next day.
Nutrition (per serving, estimate)
| Nutrition (per serving, estimate) | Amount |
|---|---|
| Calories | 350 kcal |
| Protein | 42 g |
| Carbs | 4 g |
| Fat | 18 g |
16. Surimi Lobster Salad Sandwiches
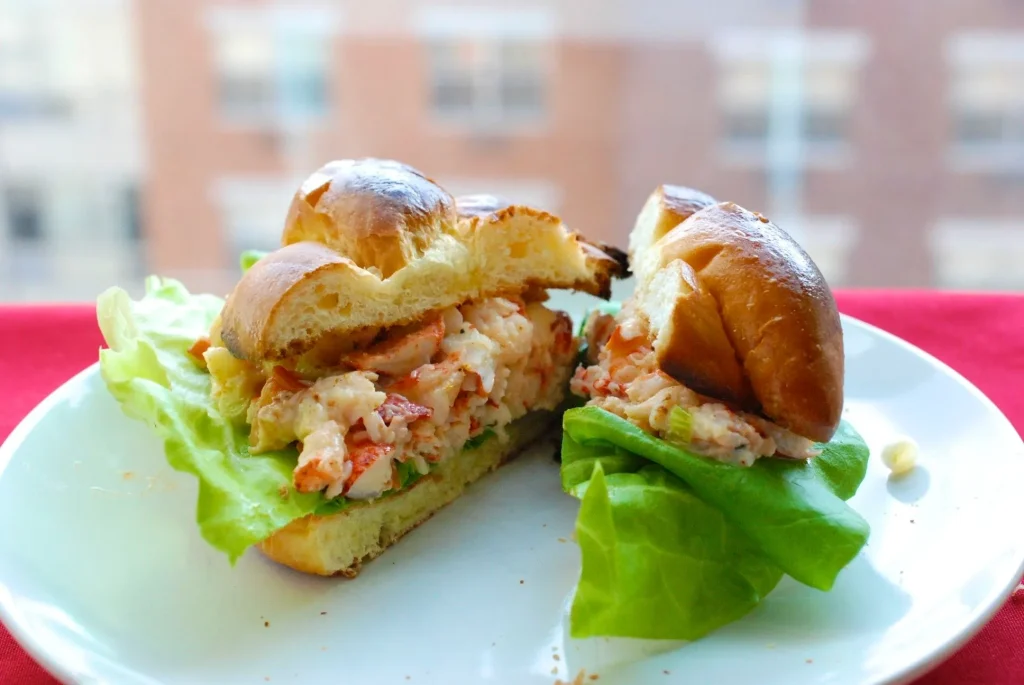
This is a 15 minute, no cook dinner. Surimi is the same imitation lobster used in the mac and cheese. It flakes into a creamy, tangy salad that tastes remarkably like a New England lobster roll. The celery adds crunch. The lemon brightens everything. This one is for hot nights when you cannot bear to turn on the stove.
Ingredients
| Ingredient | Amount |
|---|---|
| Imitation lobster (surimi, shredded) | 12 oz (340 g) |
| Mayonnaise | 1/3 cup (80 g) |
| Celery stalk (finely diced) | 1 |
| Green onion (sliced thin) | 2 |
| Lemon juice | 1 tbsp (15 ml) |
| Dijon mustard | 1 tsp (5 ml) |
| Old Bay seasoning | 1/2 tsp (1 g) |
| Salt | 1/4 tsp (1 g) |
| Black pepper | 1/8 tsp (0.5 g) |
| Hot dog buns or split top rolls | 4 |
How to Make It
- Shred the surimi into small bite sized pieces using your hands or two forks. It should look like flaked crab or lobster meat.
- In a medium bowl, combine the mayonnaise, diced celery, sliced green onion, lemon juice, Dijon mustard, Old Bay seasoning, salt, and pepper. Stir until smooth.
- Add the shredded surimi to the bowl. Fold gently until everything is coated. Do not overmix or the surimi will break down too much.
- Taste and adjust seasoning. Add more lemon juice for brightness or more Old Bay for spice.
- Toast the hot dog buns or split top rolls. You can do this in a dry skillet, under the broiler, or in a toaster.
- Spoon the surimi salad generously into each toasted bun. Pile it high.
- Serve immediately while the buns are still warm and crisp.
Quick tip or swap: For a lighter version, use Greek yogurt instead of half the mayonnaise. The salad will be tangier but still creamy. You can also serve this on lettuce wraps or crackers instead of buns. Leftovers keep in the fridge for 2 days.
Nutrition (per serving, estimate)
| Nutrition (per serving, estimate) | Amount |
|---|---|
| Calories | 470 kcal |
| Protein | 15 g |
| Carbs | 44 g |
| Fat | 26 g |
17. Roasted Cabbage Steaks with Garlic Butter
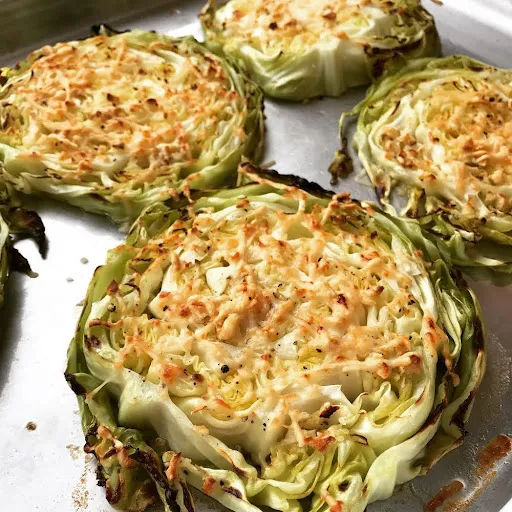
This recipe went viral in 2025 for good reason. A head of cabbage costs about $2 and transforms into something that looks and tastes substantial. The edges get crispy and caramelized. The inside stays tender. The garlic butter makes it feel like a main course, not a sad side dish. This one is for vegans, budget eaters, and anyone who wants to eat more vegetables.
Ingredients
| Ingredient | Amount |
|---|---|
| Green cabbage (large) | 1 head |
| Olive oil | 1/4 cup (60 ml) |
| Butter (or vegan butter) | 3 tbsp (42 g) |
| Garlic cloves (minced) | 4 |
| Salt | 1 tsp (6 g) |
| Black pepper | 1/2 tsp (2 g) |
| Fresh parsley (chopped) | 2 tbsp (8 g) |
| Lemon wedges (for serving) | 1 |
How to Make It
- Preheat your oven to 425°F (220°C). Line a large baking sheet with parchment paper.
- Remove any loose outer leaves from the cabbage. Slice the cabbage into 1 inch thick rounds. You should get 4 to 6 steaks from one head. The core will hold each steak together.
- Place the cabbage steaks on the prepared baking sheet. Brush both sides generously with olive oil. Season both sides with salt and pepper.
- Roast for 15 minutes. Flip the steaks carefully. Roast for another 10 to 15 minutes until the edges are deeply browned and crispy and the center is tender when pierced with a fork.
- While the cabbage roasts, melt the butter in a small saucepan over medium heat. Add the minced garlic. Cook for 1 minute until fragrant. Do not let the garlic brown.
- Remove the cabbage from the oven. Drizzle the garlic butter over each steak.
- Sprinkle with fresh parsley. Serve immediately with lemon wedges for squeezing over the top.
Quick tip or swap: Do not slice the cabbage too thin or the steaks will fall apart. 1 inch is the sweet spot. For a dairy free version, use vegan butter or extra olive oil. You can also sprinkle with nutritional yeast for a cheesy flavor.
Nutrition (per serving, estimate)
| Nutrition (per serving, estimate) | Amount |
|---|---|
| Calories | 280 kcal |
| Protein | 4 g |
| Carbs | 18 g |
| Fat | 23 g |
18. Poor Man’s Carbonara
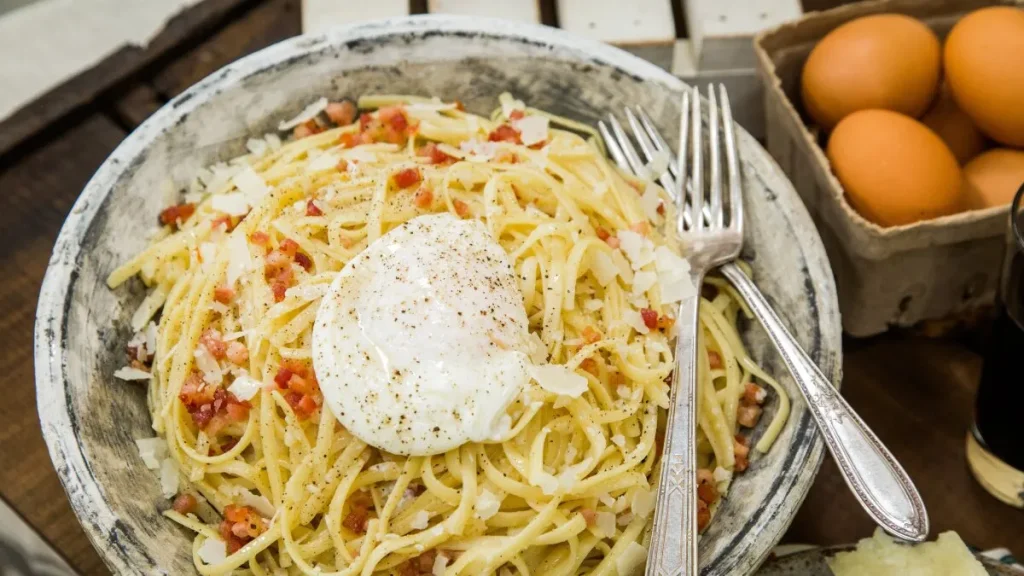
Real carbonara uses guanciale or pancetta. Those are expensive and hard to find. This version uses bacon or even just the bacon fat you have saved in the fridge. The magic comes from eggs, Pecorino cheese, and starchy pasta water. No cream. No shortcuts. Just technique. This one is for pasta lovers who want a five ingredient dinner that tastes like Rome.
Ingredients
| Ingredient | Amount |
|---|---|
| Spaghetti or bucatini | 1 lb (450 g) |
| Bacon (diced) | 6 slices (about 6 oz / 170 g) |
| Eggs (large) | 3 |
| Pecorino Romano cheese (finely grated) | 1 cup (80 g) |
| Black pepper (freshly cracked) | 1 tbsp (6 g) |
| Salt (for pasta water) | 2 tbsp (36 g) |
How to Make It
- Bring a large pot of salted water to a boil. Use plenty of salt. It should taste like the sea.
- In a small bowl, whisk together the eggs, grated Pecorino Romano, and a generous amount of black pepper. Set aside.
- Cook the pasta according to the package directions until al dente. Reserve 1 cup of the starchy pasta water before draining.
- While the pasta cooks, cook the diced bacon in a large skillet over medium heat until crispy, about 5 to 7 minutes. Do not drain the fat. That fat is flavor.
- Lower the heat under the bacon to low. Add the drained pasta to the skillet. Toss to coat in the bacon fat.
- Remove the skillet from the heat. This step is important. You do not want the eggs to scramble.
- Pour the egg and cheese mixture over the pasta. Toss quickly and vigorously. The residual heat from the pasta will cook the eggs into a creamy sauce. Do not stop tossing.
- If the sauce seems too thick, add the reserved pasta water one tablespoon at a time while tossing until the sauce becomes silky and coats each strand.
- Taste and add more black pepper. Pecorino is salty so you probably will not need extra salt.
- Serve immediately. Carbonara waits for no one. The sauce will thicken as it cools.
Quick tip or swap: Do not use cream. Real carbonara does not have cream. The creamy texture comes from the emulsion of eggs, cheese, and pasta water. If you cannot find Pecorino, use Parmesan but add a pinch of salt. For a vegetarian version, leave out the bacon and use 2 tablespoons of olive oil instead.
Nutrition (per serving, estimate)
| Nutrition (per serving, estimate) | Amount |
|---|---|
| Calories | 610 kcal |
| Protein | 24 g |
| Carbs | 68 g |
| Fat | 26 g |
19. Garlic Shrimp with Lemon and Parsley
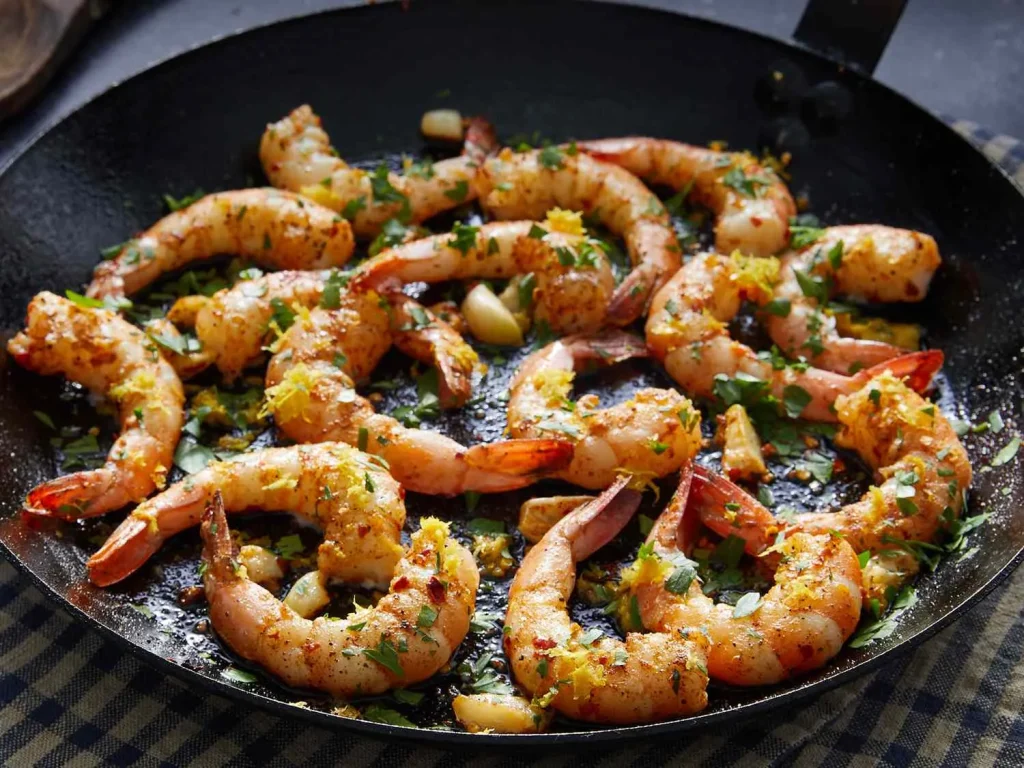
This is a 5 minute Mediterranean dinner. Keep a bag of frozen shrimp in your freezer at all times. Thaw them under cold running water in 10 minutes. A hot pan, some garlic, lemon, and parsley turn them into something bright, briny, and satisfying. This one is for the fastest weeknight dinner you will ever make.
Ingredients
| Ingredient | Amount |
|---|---|
| Shrimp (peeled, deveined, thawed) | 1 lb (450 g) |
| Garlic cloves (minced) | 6 |
| Olive oil | 3 tbsp (45 ml) |
| Lemon (juice and zest) | 1 |
| Fresh parsley (chopped) | 1/4 cup (10 g) |
| Red pepper flakes (optional) | 1/2 tsp (1 g) |
| Salt | 1/2 tsp (3 g) |
How to Make It
- Pat the shrimp completely dry with paper towels. This is the most important step. Wet shrimp will steam instead of sear.
- Season the shrimp with salt.
- Heat olive oil in a large skillet over high heat until it shimmers.
- Add the shrimp in a single layer. Do not crowd the pan. Cook in batches if needed.
- Sear without moving for 1 to 2 minutes until the bottom is golden brown and the edges turn pink.
- Flip each shrimp. Add the minced garlic and red pepper flakes if using. Cook for another 1 minute until the shrimp is pink and curled into a C shape. If the shrimp curls into an O shape, it is overcooked.
- Remove the pan from the heat. Stir in the lemon juice, lemon zest, and fresh parsley.
- Toss to coat. Serve immediately. The shrimp will continue to cook in the hot pan.
Quick tip or swap: Serve this over pasta, rice, or with crusty bread to soak up the garlic lemon oil. You can also add a splash of white wine with the garlic for extra depth. For a low carb meal, serve over zucchini noodles or cauliflower rice.
Nutrition (per serving, estimate)
| Nutrition (per serving, estimate) | Amount |
|---|---|
| Calories | 290 kcal |
| Protein | 30 g |
| Carbs | 4 g |
| Fat | 16 g |
20. Smoked Trout Dip
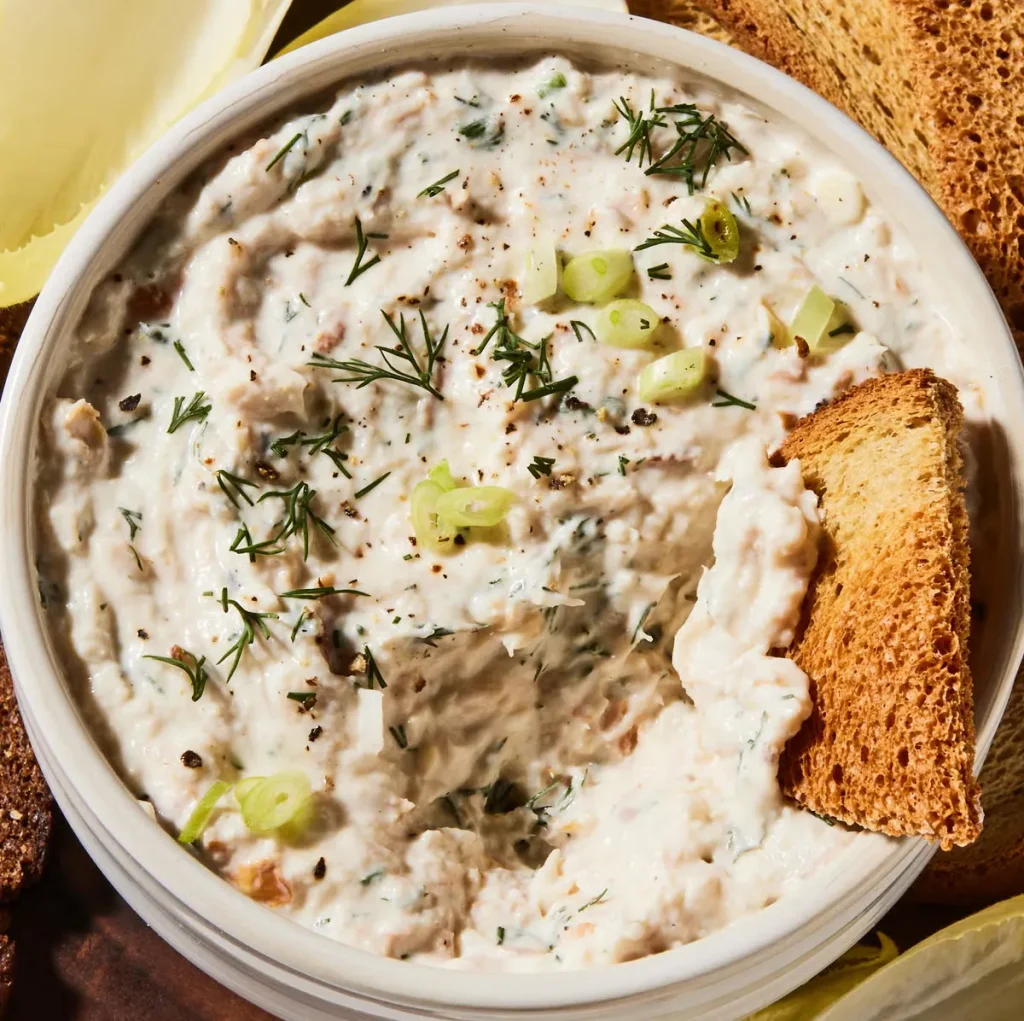
Smoked trout costs a fraction of smoked salmon but tastes just as luxurious. A single 6 ounce can costs about $5. You flake it into cream cheese, Greek yogurt, and fresh dill. The result is creamy, smoky, and bright with lemon. Serve it with crackers or vegetables. This one is for appetizer dinners or nights when you want to snack your way through dinner.
Ingredients
| Ingredient | Amount |
|---|---|
| Smoked trout (skin removed, flaked) | 6 oz (170 g) |
| Cream cheese (softened) | 8 oz (225 g) |
| Greek yogurt | 1/4 cup (60 g) |
| Fresh dill (chopped) | 2 tbsp (8 g) |
| Lemon juice | 1 tbsp (15 ml) |
| Horseradish (prepared, optional) | 1 tsp (5 g) |
| Capers (chopped, optional) | 1 tbsp (9 g) |
| Black pepper | 1/4 tsp (1 g) |
How to Make It
- Remove the skin from the smoked trout. Flake the flesh into small pieces using two forks. Check for any small bones and remove them.
- In a medium bowl, beat the softened cream cheese with a spoon until smooth.
- Add the Greek yogurt, fresh dill, lemon juice, horseradish if using, capers if using, and black pepper. Stir until combined.
- Fold in the flaked smoked trout gently. You want some chunks of fish throughout the dip.
- Taste and add more lemon juice or black pepper if needed. The dip should be smoky, creamy, and bright.
- Cover and refrigerate for at least 30 minutes before serving. The flavors need time to come together.
- Serve with crackers, cucumber slices, celery sticks, or toasted baguette.
Quick tip or swap: If you cannot find smoked trout, smoked whitefish or hot smoked salmon work well too. For a lighter dip, use all Greek yogurt and no cream cheese. The texture will be thinner but still delicious. This dip keeps in the fridge for 3 days.
Nutrition (per serving, estimate)
| Nutrition (per serving, estimate) | Amount |
|---|---|
| Calories | 240 kcal |
| Protein | 14 g |
| Carbs | 4 g |
| Fat | 18 g |
21. One Pot Lentil Bolognese
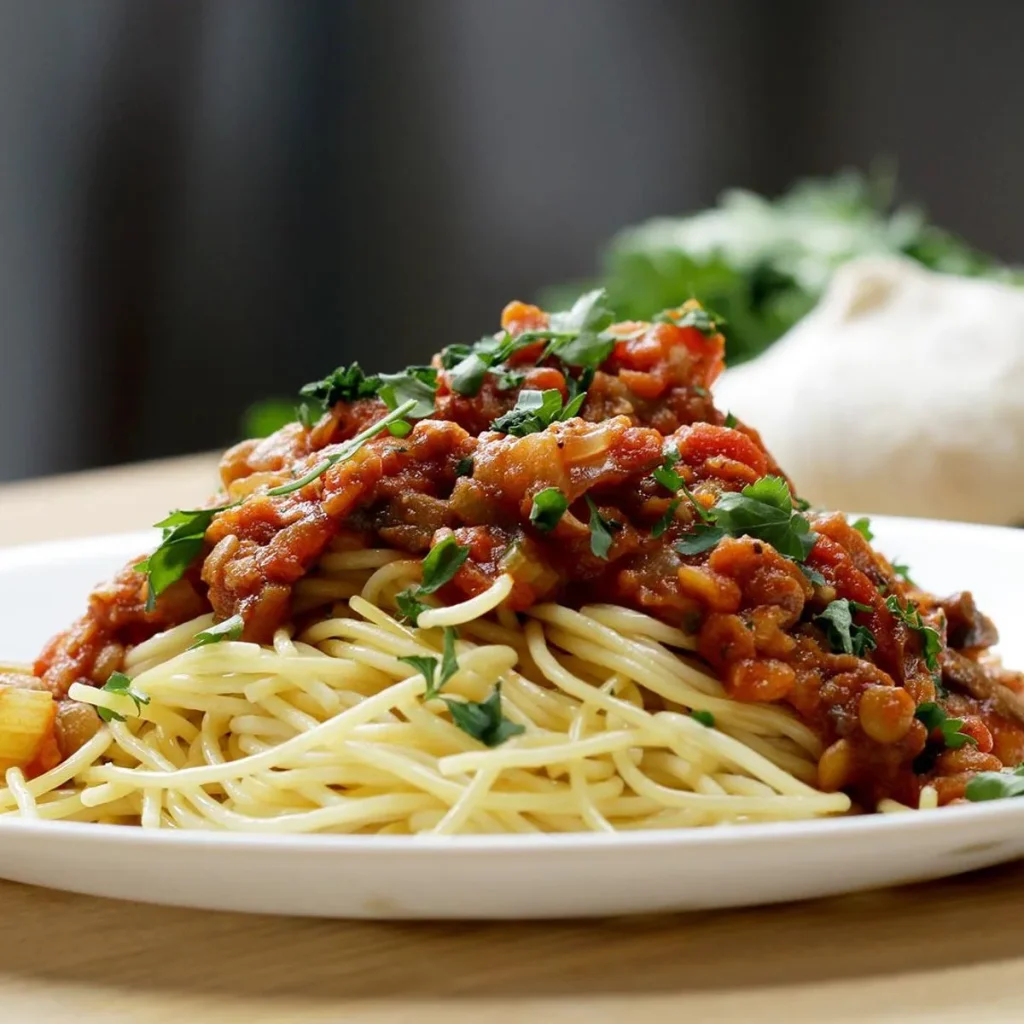
This is vegan, but it does not taste vegan. The lentils break down as they cook and create a meaty texture. The tomato and wine sauce is rich and deep. Everything cooks in one pot. No draining pasta. No separate sauce pan. This one is for meat eaters who want to eat more plants and for anyone who hates washing dishes.
Ingredients
| Ingredient | Amount |
|---|---|
| Brown or green lentils (dried) | 1 cup (200 g) |
| Onion (diced) | 1 medium |
| Carrot (diced) | 2 medium |
| Celery stalk (diced) | 2 |
| Garlic cloves (minced) | 4 |
| Canned crushed tomatoes | 28 oz (794 g) |
| Vegetable broth | 2 cups (480 ml) |
| Dry red wine (or more broth) | 1/2 cup (120 ml) |
| Dried oregano | 1 tbsp (3 g) |
| Bay leaf | 1 |
| Olive oil | 2 tbsp (30 ml) |
| Salt | 1 tsp (6 g) |
| Black pepper | 1/2 tsp (2 g) |
| Pasta of your choice | 12 oz (340 g) |
How to Make It
- Rinse the lentils under cold water. Pick out any small stones or debris.
- Heat olive oil in a large Dutch oven or pot over medium heat. Add the onion, carrot, and celery. Cook for 8 to 10 minutes until very soft. The vegetables should smell sweet.
- Add the garlic and oregano. Cook for 1 minute until fragrant.
- Add the crushed tomatoes, vegetable broth, red wine, rinsed lentils, bay leaf, salt, and pepper. Stir to combine.
- Bring to a simmer. Lower the heat to medium low. Cover and cook for 25 to 30 minutes until the lentils are tender. They should break apart when pressed with a spoon.
- While the sauce simmers, cook your pasta in a separate pot according to the package directions.
- Remove the bay leaf from the sauce. Taste and adjust salt and pepper.
- Serve the lentil Bolognese over the cooked pasta. The sauce should be thick and chunky with tender lentils.
Quick tip or swap: Do not skip the carrot and celery. They are the backbone of the sauce. For a gluten free meal, use gluten free pasta. This sauce freezes beautifully for up to 3 months. You can also serve it over zucchini noodles or spaghetti squash.
Nutrition (per serving, estimate)
| Nutrition (per serving, estimate) | Amount |
|---|---|
| Calories | 490 kcal |
| Protein | 20 g |
| Carbs | 86 g |
| Fat | 7 g |
22. Pan Seared Scallops with Lobster Sauce
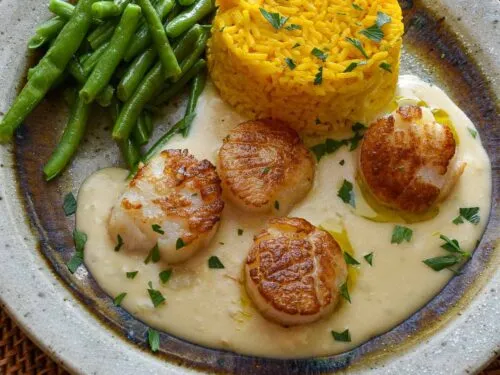
This sounds like a special occasion dinner. And it is. But it is also a budget dinner. Frozen scallops cost about $8 for a half pound. The lobster sauce has no lobster. It is a rich, creamy, tomatoey butter sauce that tastes luxurious anyway. This one is for anniversaries, birthdays, or any Tuesday you want to feel fancy.
Ingredients
| Ingredient | Amount |
|---|---|
| Scallops (frozen, thawed) | 12 large (about 12 oz / 340 g) |
| Butter (unsalted) | 4 tbsp (56 g) |
| Garlic cloves (minced) | 3 |
| Tomato paste | 2 tbsp (32 g) |
| Heavy cream | 1/2 cup (120 ml) |
| Seafood or chicken broth | 1/2 cup (120 ml) |
| Paprika | 1/2 tsp (1 g) |
| Salt | 1/2 tsp (3 g) |
| Olive oil | 1 tbsp (15 ml) |
How to Make It
- Pat the scallops completely dry with paper towels. Wet scallops will not sear. Look for the side muscle on each scallop and pull it off. It is a small, tough rectangle of tissue.
- Season the scallops generously with salt on both sides.
- Heat olive oil in a heavy skillet over high heat until it smokes slightly.
- Add the scallops in a single layer. Do not crowd the pan. Sear without moving for 2 minutes. The bottom should be deep golden brown with a crisp crust.
- Flip each scallop. Sear for another 1 to 2 minutes. The scallops should feel firm but still springy. Remove them from the pan.
- Lower the heat to medium. Melt 2 tablespoons of butter in the same skillet. Add the garlic. Cook for 30 seconds until fragrant.
- Add the tomato paste. Cook, stirring constantly, for 1 to 2 minutes until the tomato paste darkens to a brick red color.
- Pour in the broth. Scrape up the browned bits from the bottom of the pan.
- Add the heavy cream and paprika. Simmer for 2 to 3 minutes until the sauce thickens slightly.
- Whisk in the remaining 2 tablespoons of butter until the sauce is glossy.
- Return the scallops to the pan. Spoon the sauce over them. Serve immediately.
Quick tip or swap: Do not overcook scallops. They go from perfectly tender to rubbery in about 30 seconds. If you cannot afford scallops, use shrimp or more langostino. The sauce is the star here.
Nutrition (per serving, estimate)
| Nutrition (per serving, estimate) | Amount |
|---|---|
| Calories | 430 kcal |
| Protein | 18 g |
| Carbs | 8 g |
| Fat | 36 g |
23. Cauliflower Crust White Pizza
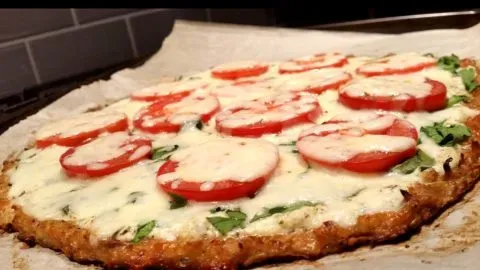
This is low carb, gluten free, and actually delicious. Many cauliflower crusts taste like cardboard. This one does not. The secret is squeezing every drop of water out of the cauliflower before baking. The white pizza uses ricotta, garlic, and mozzarella. No red sauce. This one is for pizza night when you want something lighter.
Ingredients
| Ingredient | Amount |
|---|---|
| Cauliflower rice (fresh or frozen) | 3 cups (300 g) |
| Mozzarella cheese (grated) | 2 cups (200 g) |
| Ricotta cheese | 1/2 cup (120 g) |
| Parmesan cheese (grated) | 1/4 cup (20 g) |
| Egg | 1 large |
| Garlic cloves (minced) | 2 |
| Dried oregano | 1 tsp (2 g) |
| Salt | 1/2 tsp (3 g) |
How to Make It
- Preheat your oven to 400°F (200°C). Line a baking sheet with parchment paper.
- If using fresh cauliflower, pulse it in a food processor until it looks like rice. You need 3 cups.
- Cook the cauliflower rice in a dry skillet over medium heat for 5 to 7 minutes until it releases steam and looks dry. This step removes moisture.
- Let the cauliflower cool slightly. Transfer it to a clean kitchen towel or cheesecloth. Squeeze hard to remove as much water as possible. This step is critical. Wet cauliflower makes soggy crust.
- In a bowl, combine the squeezed dry cauliflower, 1 cup of the mozzarella cheese, Parmesan cheese, egg, garlic, oregano, and salt. Mix until a dough forms.
- Transfer the dough to the prepared baking sheet. Press it into a circle about 1/4 inch thick. Make the edges slightly thicker for a crust.
- Bake for 12 to 15 minutes until the crust is golden brown and firm to the touch.
- Remove from the oven. Spread the ricotta cheese over the crust. Sprinkle with the remaining cup of mozzarella cheese.
- Return to the oven. Bake for another 8 to 10 minutes until the cheese is melted and bubbly with brown spots.
- Let the pizza cool for 5 minutes before slicing. The crust needs time to set.
Quick tip or swap: Do not skip squeezing the cauliflower. I have made this mistake. The crust will be a wet mess. For a dairy free version, use vegan cheeses. They work but the texture will be different. Top with fresh basil or red pepper flakes before serving.
Nutrition (per serving, estimate)
| Nutrition (per serving, estimate) | Amount |
|---|---|
| Calories | 380 kcal |
| Protein | 24 g |
| Carbs | 12 g |
| Fat | 26 g |
24. Cabbage Roll Soup
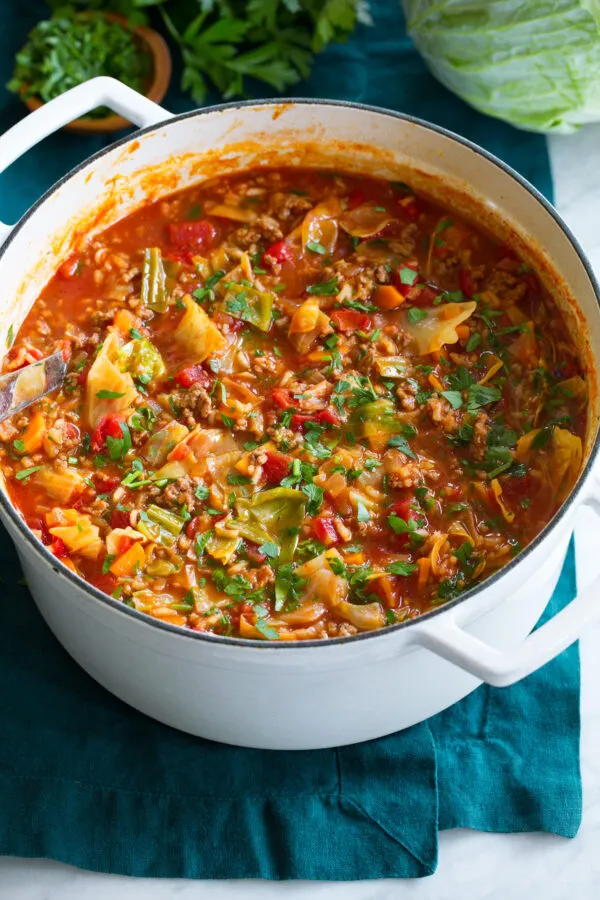
Cabbage rolls are delicious but fussy. You have to boil the leaves. You have to roll each one. This soup gives you all the same flavors in half the time. Ground meat, rice, cabbage, and tomato broth simmer together until the cabbage is tender and the rice is cooked. This one is for anyone who loves cabbage rolls but hates rolling them.
Ingredients
| Ingredient | Amount |
|---|---|
| Ground beef (or turkey) | 1 lb (450 g) |
| Green cabbage (chopped) | 1/2 head (about 1 lb / 450 g) |
| Onion (diced) | 1 medium |
| Garlic cloves (minced) | 3 |
| Canned crushed tomatoes | 28 oz (794 g) |
| Beef broth | 4 cups (960 ml) |
| White rice (uncooked) | 1/2 cup (90 g) |
| Paprika | 1 tbsp (7 g) |
| Salt | 1 tsp (6 g) |
| Black pepper | 1/2 tsp (2 g) |
| Fresh dill (optional) | 2 tbsp (8 g) |
How to Make It
- Heat a large pot over medium high heat. Add the ground beef. Cook until browned, breaking it up with a spoon, about 5 to 7 minutes. Drain excess fat if needed.
- Add the onion and garlic. Cook for 3 to 4 minutes until the onion softens.
- Stir in the paprika. Cook for 1 minute until fragrant.
- Add the chopped cabbage, crushed tomatoes, beef broth, uncooked rice, salt, and pepper. Stir to combine.
- Bring the soup to a boil. Lower the heat to medium low. Cover and simmer for 25 to 30 minutes until the rice is tender and the cabbage is soft.
- Taste and adjust salt and pepper. Stir in fresh dill if using.
- Serve hot with crusty bread. The soup will thicken as it sits.
Quick tip or swap: For a vegetarian version, use plant based ground meat or extra lentils. Swap the beef broth for vegetable broth. This soup freezes well for up to 3 months. Reheat gently on the stove.
Nutrition (per serving, estimate)
| Nutrition (per serving, estimate) | Amount |
|---|---|
| Calories | 420 kcal |
| Protein | 28 g |
| Carbs | 38 g |
| Fat | 18 g |
25. Tuna and White Bean Salad
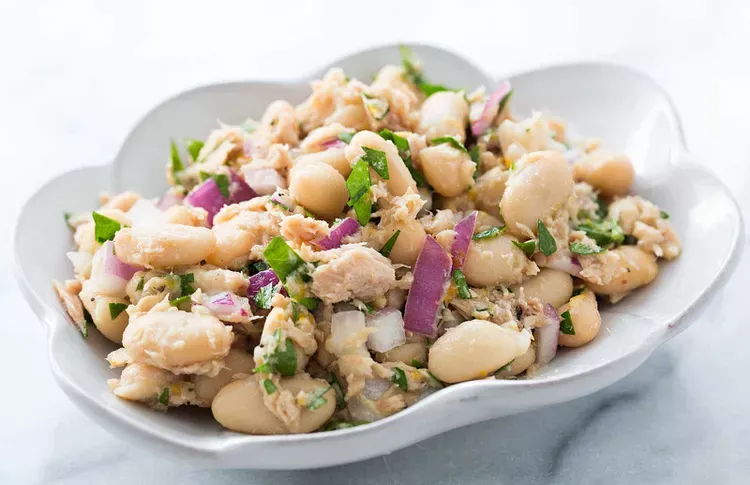
This is a no cook, pantry only dinner. Open two cans. Add some olive oil and lemon. That is it. The combination of tuna and white beans is classic Italian comfort food. The beans add creaminess and protein. The tuna adds savory depth. This one is for nights when you have zero energy but still want something satisfying.
Ingredients
| Ingredient | Amount |
|---|---|
| Canned tuna (in olive oil, drained) | 2 cans (5 oz / 142 g each) |
| Canned white beans (cannellini, drained and rinsed) | 2 cans (15 oz / 425 g each) |
| Red onion (very finely diced) | 1/4 cup (40 g) |
| Fresh parsley (chopped) | 1/4 cup (10 g) |
| Olive oil | 3 tbsp (45 ml) |
| Lemon juice | 2 tbsp (30 ml) |
| Salt | 1/2 tsp (3 g) |
| Black pepper | 1/4 tsp (1 g) |
How to Make It
- Drain the tuna. If you used tuna packed in water, add an extra tablespoon of olive oil.
- Drain and rinse the white beans. Shake off excess water.
- In a large bowl, combine the tuna, white beans, red onion, and parsley.
- In a small bowl, whisk together the olive oil, lemon juice, salt, and pepper.
- Pour the dressing over the tuna and beans. Toss gently to combine. Do not mash the beans.
- Taste and add more lemon juice or salt as needed. The salad should taste bright and savory.
- Let the salad sit for 10 minutes before serving so the flavors come together.
- Serve on its own, over greens, or with crackers.
Quick tip or swap: Use tuna packed in olive oil if you can find it. The flavor is much better than tuna packed in water. For a spicy version, add a pinch of red pepper flakes. This salad keeps in the fridge for 2 days.
Nutrition (per serving, estimate)
| Nutrition (per serving, estimate) | Amount |
|---|---|
| Calories | 440 kcal |
| Protein | 32 g |
| Carbs | 28 g |
| Fat | 22 g |
26. Budget Chicken Tinga Tacos
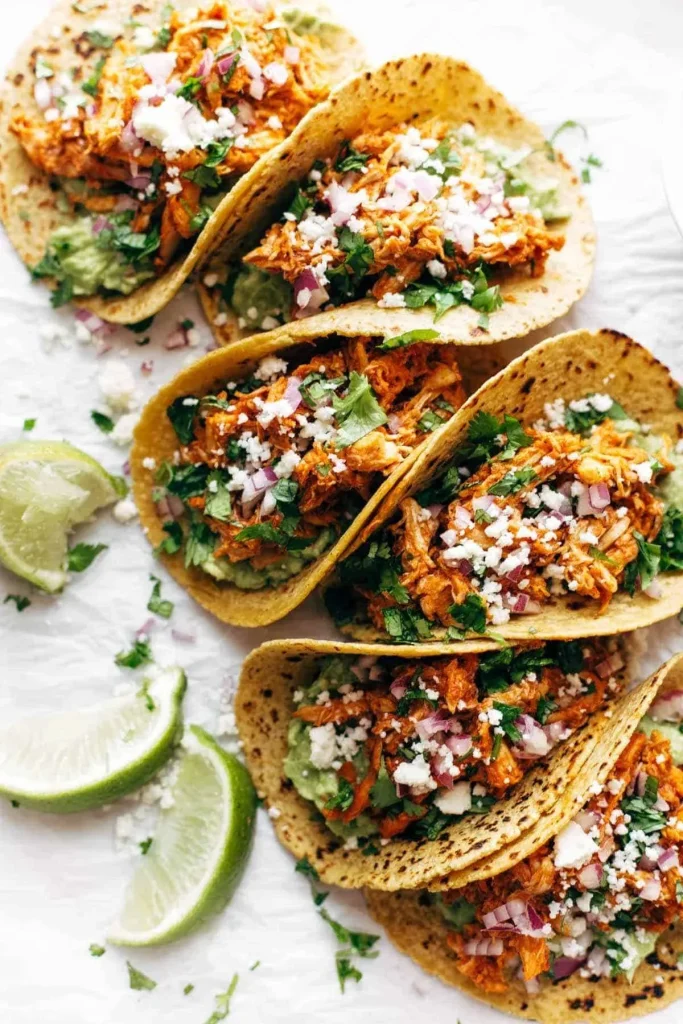
This slow cooker recipe turns the cheapest chicken parts into something incredible. Chicken thighs or drumsticks cook in a smoky tomato chipotle sauce until they fall apart. Shred the meat. Pile it onto corn tortillas. This one is for taco night when you want big flavor without big spending.
Ingredients
| Ingredient | Amount |
|---|---|
| Chicken thighs or drumsticks | 2 lb (900 g) |
| Canned crushed tomatoes | 15 oz (425 g) |
| Onion (chopped) | 1 medium |
| Chipotle peppers in adobo sauce | 2 peppers + 1 tbsp sauce |
| Garlic cloves | 4 |
| Chicken broth | 1/2 cup (120 ml) |
| Dried oregano | 1 tsp (2 g) |
| Cumin | 1 tsp (2 g) |
| Salt | 1 tsp (6 g) |
| Corn tortillas | 12 |
| Toppings (cilantro, onion, lime) | as desired |
How to Make It
- Place the chicken thighs or drumsticks in the bottom of a slow cooker.
- In a blender, combine the crushed tomatoes, onion, chipotle peppers, adobo sauce, garlic, chicken broth, oregano, cumin, and salt. Blend until smooth.
- Pour the sauce over the chicken. Stir to coat.
- Cover and cook on low for 6 to 8 hours or on high for 3 to 4 hours. The chicken should be fall apart tender.
- Remove the chicken from the slow cooker. Shred the meat using two forks. Discard the bones if using drumsticks.
- Return the shredded chicken to the sauce in the slow cooker. Stir to combine.
- Warm the corn tortillas in a dry skillet or directly over a gas flame. They should be soft and slightly charred.
- Serve the chicken tinga on the warm tortillas with chopped cilantro, diced onion, and a squeeze of lime.
Quick tip or swap: Chipotle peppers in adobo are spicy. Start with one pepper if you are sensitive to heat. Freeze the leftover peppers in a zip top bag for next time. For an Instant Pot version, cook on high pressure for 20 minutes with a natural release.
Nutrition (per serving, estimate)
| Nutrition (per serving, estimate) | Amount |
|---|---|
| Calories | 480 kcal |
| Protein | 34 g |
| Carbs | 34 g |
| Fat | 22 g |
27. Black Bean Burgers
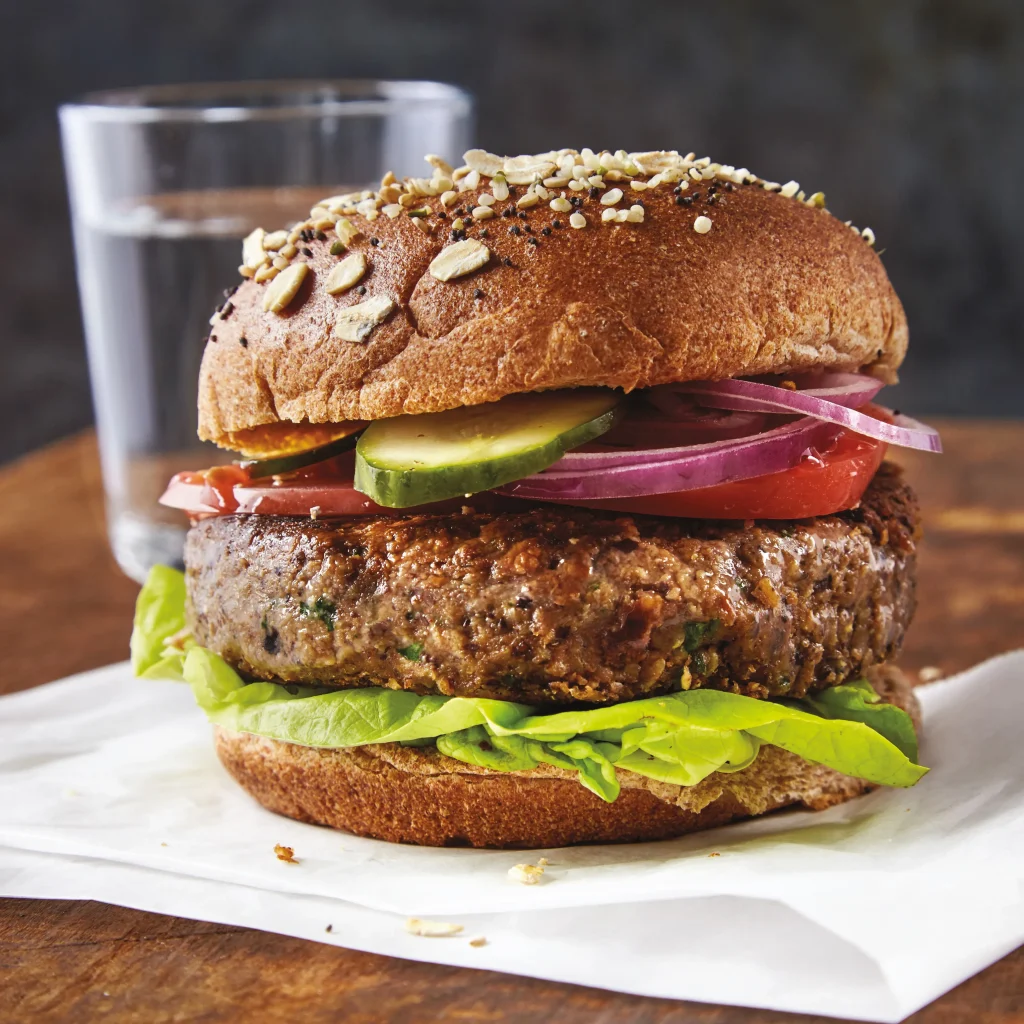
These are not dry, crumbly veggie burgers. These are hearty, meaty, satisfying black bean burgers that hold together on the grill. The secret is mashing some of the beans and leaving some whole. Oatmeal binds everything without making it taste like cardboard. This one is for meatless Monday or any night you want a great burger.
Ingredients
| Ingredient | Amount |
|---|---|
| Canned black beans (drained and rinsed) | 2 cans (15 oz / 425 g each) |
| Rolled oats (not instant) | 1 cup (80 g) |
| Onion (finely diced) | 1/2 cup (80 g) |
| Garlic cloves (minced) | 2 |
| Cumin | 1 tbsp (7 g) |
| Smoked paprika | 1 tsp (2 g) |
| Salt | 1 tsp (6 g) |
| Egg (or flax egg for vegan) | 1 |
| Olive oil (for frying) | 2 tbsp (30 ml) |
| Burger buns | 4 |
How to Make It
- Drain and rinse the black beans. Spread them on a baking sheet lined with paper towels. Pat them dry. Removing moisture is important.
- Transfer the beans to a large bowl. Mash about half of them with a fork. Leave the other half whole. This gives the burgers texture.
- Add the rolled oats, diced onion, garlic, cumin, smoked paprika, salt, and egg. Mix with your hands until everything comes together. The mixture should hold together when squeezed.
- Divide the mixture into 4 equal portions. Shape each portion into a patty about 3 inches wide and 1/2 inch thick.
- Heat olive oil in a large skillet over medium heat.
- Cook the patties for 4 to 5 minutes per side until deep golden brown and firm to the touch. They should hold together when flipped.
- Toast the burger buns in the same skillet after you remove the patties.
- Serve the black bean burgers on the toasted buns with your favorite toppings. Lettuce, tomato, onion, and a sauce like mayo or avocado work well.
Quick tip or swap: For a vegan version, use a flax egg. Mix 1 tablespoon of ground flaxseed with 3 tablespoons of water and let it sit for 5 minutes. These burgers freeze beautifully. Place them on a baking sheet to freeze individually, then transfer to a bag.
Nutrition (per serving, estimate)
| Nutrition (per serving, estimate) | Amount |
|---|---|
| Calories | 490 kcal |
| Protein | 18 g |
| Carbs | 74 g |
| Fat | 14 g |
These 27 budget dinner ideas that don’t taste cheap prove that cooking well on a budget is not about cutting corners. It is about smart techniques, pantry staples, and knowing where flavor actually comes from. Hint: it does not come from expensive ingredients. Save this post for the next time you are staring into an open fridge thinking there is nothing to eat. Try the Garlic Parmesan Chicken first. Or the Poor Man’s Lobster if you want to feel fancy. And when you nail one, leave a comment. I want to hear which recipe surprised you most. Budget dinner ideas that don’t taste cheap are not a myth. They are just these 27 recipes.